How Do I Paint Elf Ears?
Do I need to buy painted ears?
These are probably the most common questions we hear from our customers. While we have had a tutorial for years on How to Apply Your Aradani Elf Ears, Mike, Sara, and I decided to share exactly how we paint elf ears.
Purchasing a pair of our pre-painted ears not only is less work for you, but saves you from purchasing supplies that you might only use rarely (RMG make-up, make-up sponges, setting powder (talc), powder puffs, etc.). While RMG make-up is not totally permanent, the make-up on our pre-painted should last for at least 6 months to a year without needing touch-ups (depending on how often you wear the ears).
If you order the Pro Kit option from our website, your ears will already be pre-painted to the color you select, and you will also have the RMG make-ups necessary to do touch-ups on your ears in the future. So whether you need help painting a pair of unpainted ears from scratch or just need to do some subtle touch-ups to your ears, this tutorial will guide you to Paint Elf Ears, the Aradani Way.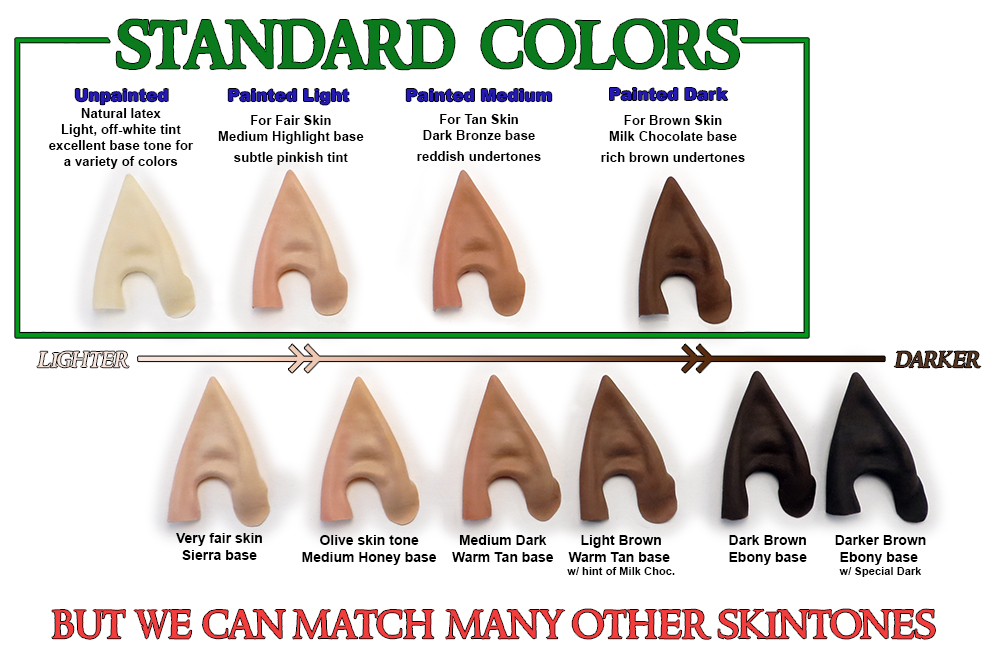 .
.
Unpainted Latex
As a natural product, latex can vary in color from an almost white, to a yellow, to even a light pink. We attempt to achieve a uniform color in our products, and so we use the same process every time to color each 5 gallon bucket when it is first opened. But even with this consistent process, this natural variation typically doesn’t lead to a very realistic color match for skin. This tutorial will help explain how we apply RMG make-up to Aradani elf ears to mask the underlying latex color, achieving a more realistic and believable look.
Supplies Needed
If you plan to paint the ears, here is a short list of the supplies you will need.
- Unpainted pair of Aradani elf ears
- a few different shades of RMG make-ups
- Round Make-up sponges*
- Talc or Baby Powder
- Powder Puff
This tutorial will only focus on painting the ears. For application, removal, and care, please visit our other tutorial.
*We personally feel the round make-up sponges are better and provide more control than the wedge shaped ones and produce a more natural blending of color.
Painting the Ears
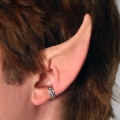
The problem with most of painting instructions, is that they want you to apply make-up directly on your skin. That means every time you want to wear your ears, you’ll have to blend them into your skin again! We want to avoid this. Our goal is to get the ears close to your skin tone so you don’t apply make-up directly to your skin. Any difference in color will be hidden with ear cuffs or hair, as described here.
We recommend RMG (rubber mask grease) paint for painting elf ears. RMG is castor oil based, and is specifically designed for applying on latex prosthetics. We sell this in both a Light Stack and a Dark Stack. The RMG Light Stack contains all the colors that can be used to paint either or Light or Medium skintones.
There is one rule to keep in mind when painting latex proshetics. Do NOT use mineral oil based make-up. Mineral oil will break down the latex over time, eventually turning the latex soft and gummy. IF you can’t find the ingredient list for your make-up, we recommend not using it, or contact the manufacturer.
Depending on your skin tone, we recommend using 2 different flesh tones and a red to achieve a realistic look. Many times when we see people wearing non-Aradani elf ears or ears they have painted themselves,  they don’t use any red make-up along the back curve of the ear. Because of the thinness of the skin, most ears have more pink and red along this area then the rest of their ears. Even if you think your ears aren’t that pink, that subtle shading of pink tones along the back of the ear make a significant difference between an ear that requires a double take, or ones that immediately jump out as fake.
The easiest way to visualize painting the ears is to think about the elf ear in three sections,
1) the Body (Blue) 2) the Flap (green), and 3) the Back Curve (Red).
Fair skin: If using the RMG Light Stack, use the following:
1) Mostly Graceful Swan, with a dab of Dark Bronze 2) Graceful Swan 3) dab of red
For more specific colors, you can also try:
1) Medium Highlight, 2) Graceful Swan, and 3) Rose Blush
So for example, on fair skin ears, first paint the body of the ear with Medium Highlight. Second, paint the flap with Graceful Swan, and blending the lighter color up onto the body of the ear (note the green and blue overlap). Finally, using just a small amount of Rose Blush, touch up the back curve to add a slight red tint to the ears. If using straight red versus rose blush, be careful not to overdo the red. A small dab of pure red goes a long way!!!
Tanned Skin: If using the RMG Light Stack, use the following:
1) Dark Bronze 2) Graceful Swan 3) dab of red
For more specific colors, you can also try:
1) Dark Bronze or Warm Tan, 2) Graceful Swan or Medium Highlight, and 3) Rose Blush
Follow the above steps for painting medium skin tone ears as well.
Dark Skin: If using the RMG Dark Stack, use whichever color best matches your skintone to paint the entire ear(Warm Tan, Milk Chocolate or Ebony), then use the other two colors for highlights and shadows.
Darker skin tones tend to have more variation than lighter ones. Some darker tones have subtle reds, others do not. We typically paint a single color over the entire ear, then use a shade lighter or a shade darker to add some variation to the ear to help deepen the shadows or lighten the highlights.
If you want to know what colors to best paint your ears, you can always use our Contact Us form and we can assist you.
Setting the Make-up
RMG make-up is castor oil based, and when first applied will still be wet and shiny. This make-up is also not permanent, so it will rub off over time and the more the ears are handled. But if set properly, it should last on the ears for many months, even years, depending on how often you use them.
Once the ears are fully painted, it is time to set them with powder. You can purchase setting powder, but honestly baby powder is what we use, and is much easier to find locally. Applying talc will absorb most of the oils in the make-up, and make it much harder to smudge or rub off the make-up from the ears.
- Dab your powder puff in the powder.
- Pat the powder all over the ear, it will now have a chalky look to it.
- Continue patting to remove any remaining powder with the puff.
It is better to pat the ears than wipe, as wiping will have more of a chance of smudging or removing the make-up then setting it.
All of the photos in this tutorial show our Aradani Studios Anime Elf Ear. The painting process is the same for any type of elf ear you buy, no matter how long or short. When you are not wearing your ears, make sure to store them in a small plastic baggie. This helps prevent the make-up from rubbing off the ears.
Once you are ready to wear your ears, don’t forget to visit, How to Apply Your Aradani Elf Ears.
Thanks,
Paul, Mike, & Sara
Owners, Aradani Studios
Visit our storefront to purchase your elf ears!