
For those of you that have met me, you know that I am a diehard Zelda fan. I still remember purchasing the original Legend of Zelda for my NES. I remember buying it while on vacation in Michigan, even though my NES was at home in Tennessee. I remember reading the instruction manual over and over, because other than that, there was no way to enjoy my new purchase.
Well, I have started working on a new Link costume, and we have finished the first part of the costume. I assume after seeing this picture, you’ll guess which game its for. Wait a minute… I put the game’s name in the title of the article, so duh, you already know what it is.

I have to be honest, I have never played a Dynasty Warriors game, and even though I am working on this costume, I have yet to play Hyrule Warriors yet either! When I told my brother about the costume and showed him the screenshots of the scarf, he told me that we had to “do it right.” That meant no screen printing, as that would be the cheap option. Instead, we decided to have the symbol embroidered on the scarf.
But the problem is that the symbol isn’t on there once, it is on there twice, the front and the back! And I don’t know if you have ever looked into getting something custom embroidered, but it is rather expensive. Just the digitizing fee alone, essentially taking your image file and converting it to a pattern of stitches runs about $75-100. Then on top of that you have to pay for the embroidery! Thankfully I found a gentleman on the RPF that had just purchased an embroidery machine and wanted to play around with it. We worked out a very reasonable price, so it was time to find a scarf.
I went on eBay and found a Pashmina/silk scarf that was 78 inches long, and 28 inches wide (by the way, I have no clue what Pashmina is… nevermind, now I do). When it arrived, I realized that even at 78 inches, it wasn’t long enough to hang down to the floor and provide enough bulk wrapped around my neck. It was also way too wide, so the solution was to cut it in half length wise, resulting in a scarf over 12 feet long and over a foot wide!
I bought a second red scarf, which was used for making the red stripes along the bottom. We also purchased some tassel trim at Jo-Ann’s to finish the edge of the scarf. It was now time to mail the scarf off to the embroiderer. Unfortunately, he was located in the UK, which meant it was more expensive to mail it, and it would take significantly longer to arrive. But the finished product was well worth it.
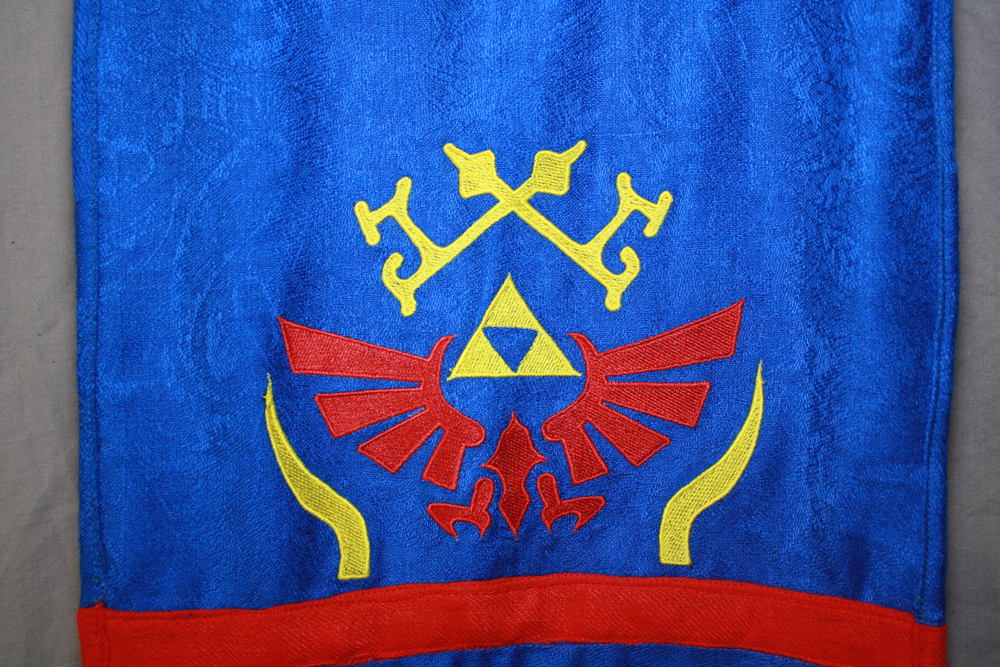
We had him embroider the pattern twice, and then sewed them together back-to-back. Laura attached the red stripes and the tassels, and then hem all the edges of the scarf, all the way along both 12 foot edges of the scarf! Phew.
And now that the scarf is complete, it’s time to work on the rest of the costume. I’m hoping to have it ready for Dragon*Con this year. And in case I don’t, I have a wonderfully geeky scarf to wear when I go out and about. The first time that I wore this out, my friends and I went shopping at Target. A mom stopped me, eyes wide open, and asked me where I got my scarf. When I told her that I had it custom made, she got a little sad, as she said that it would have been the perfect gift for her oldest son. I know I shouldn’t be so excited for being so geeky, but I was.