
Ander Elessedil
Chronicles of Shannara
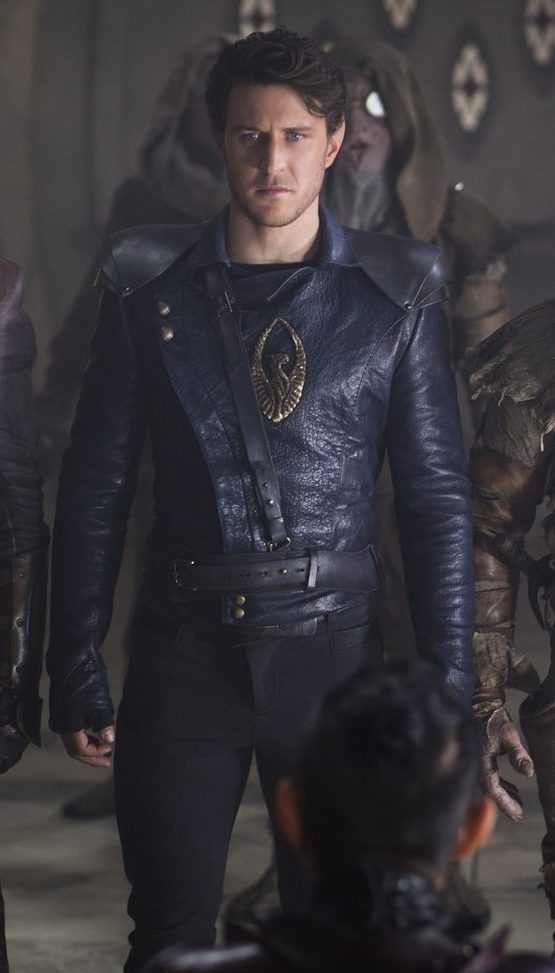
The Sword of Shannara was one of the first fantasy books that I read (after The Lord of the Rings, of course). I very much enjoyed the original trilogy and the Scions quadrilogy that followed. Of course, any fantasy movie or television series is required watching when you make elf ears for a living.
MTV hasn’t announced an official release date for The Chronicles of Shannara season 2 yet, but it is definitely in the works. In anticipation, I have begun work on my Ander Elessedil costume, and will be showcasing its development as it happens. Please let me know if you have any questions if you would like to make this costume as well.
The jacket
As with most costumes, I have found that there is no reason to reinvent the wheel. While I excel at leather working and prop-making, my ability to sew in non-existent. So rather than struggling to make a not-so-great jacket, I went online.
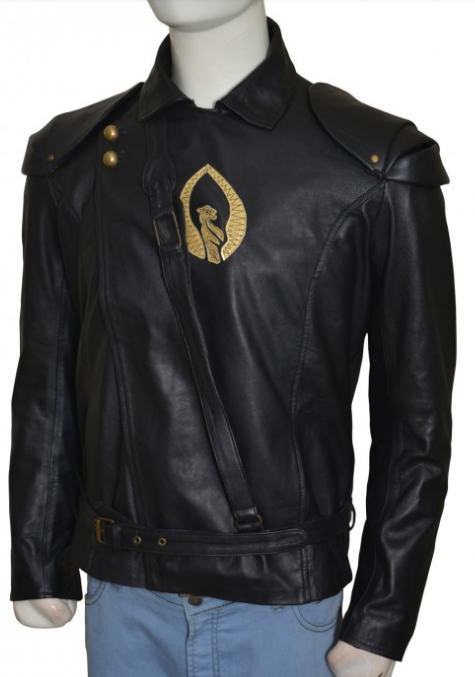
As it turns out, a Shannara costume is no different. A quick internet search found this jacket. I had never ordered from Instyle Jackets before, but thankfully they accept Paypal, so I had someone on my side if something went awry.
The jacket didn’t ship as quickly as they promised, but it was Christmas/New Year’s. I contacted the company a few times, and both times was told via Chat that it had previously shipped or would ship in 1-2 days. However, they could not provide a tracking number. I was about to start a dispute on Paypal, when I got home and found the package on my doorstep. They still never emailed me a tracking number, but package arriving trumps tracking notification. They still have my support if I need another costume jacket.
My first step is to gut the portions of the costume that I know I can do a better job. So the faux leather belts and the faux leather pauldrons are toast. I still have plenty of black armor-grade leather from our Trolloc costumes, so time to enhance this jacket. I also plan to hand tool the Elessedil Griffin crest that is on the jacket. The… thing… that comes attached to the jacket is… not so good.
Alterations
 Removing the Crest
So the first step was to pop off the Amoeba crest… or was that a griffin. Anyway, I carefully cut the stitches and removed the crest. Unfortunately, there was a thin sheet of foam on the inside used for backing for the stitching. Without the crest, this started floating on the interior of the jacket. I plan to attach a new crest over the holes left from removing the crest, so I figured another bigger hole was alright. Surgically cutting open the leather, I fished the foam out. I then glued the cut closed with fabric glue and spare material from the faux pauldrons. Be very careful, once you cut this stuff, it just wants to continue tearing!
The Belts: The Waist Belt
The next step was to make the belts. I started with the wider waist belt, since the other belts all have to attach to that as their foundation. I started with a 2.5 inch wide kilt belt, and carved the curved shape out of this single belt, as seen in the image above. The buckle end is rounded (see photo below), and the other end narrows to fit the 1 1/4″ buckle. While the show used a more simple buckle, I really liked this Celtic buckle from Tandy Leather. To me it matches the Elven architecture of both Shannara and T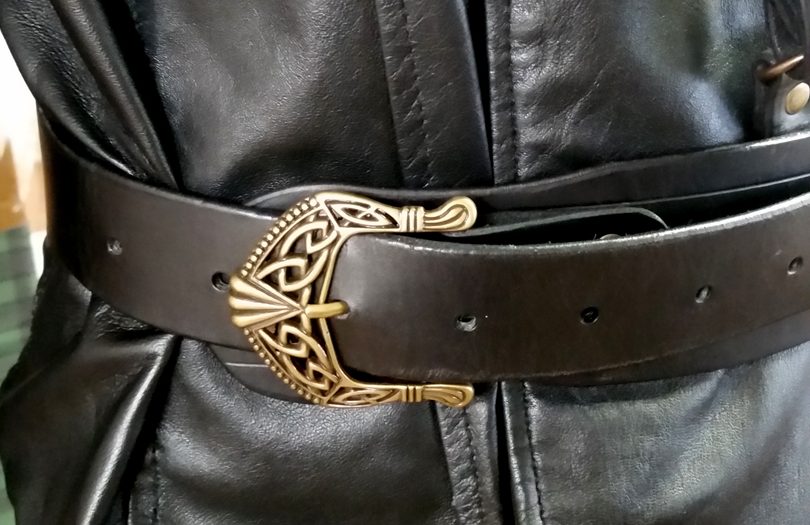 he Lord of the Rings. So I spruced up the buckle a bit compared to the show.
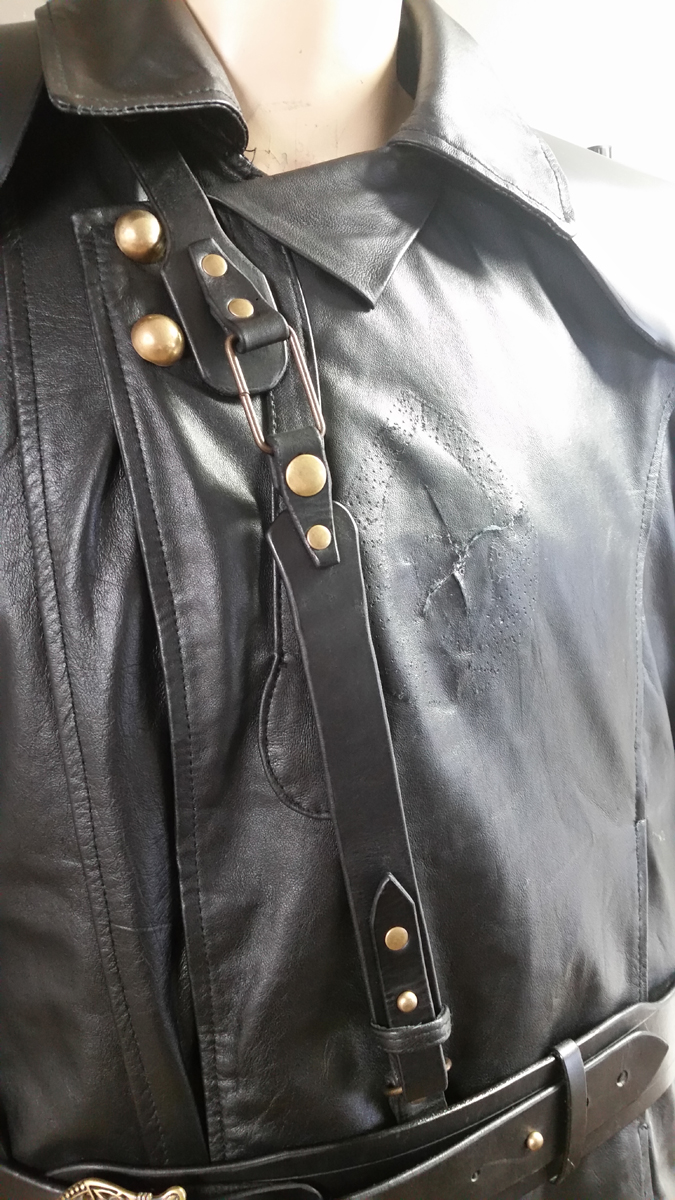
The Belts: The Shoulder Strap
There is one other belt, the shoulder strap, which can be viewed as 2 parts. One half attaches to the waist belt near the back of the left hip, crosses the back, goes under the right collar, and ends in a brass rectangle loop near the chest. The other attaches to that loop and connects down near the left hip in the front. Depending on the photo, Ander wears this shoulder strap both buckled and hanging loose (as seen in the photo of Ander Elessedil here).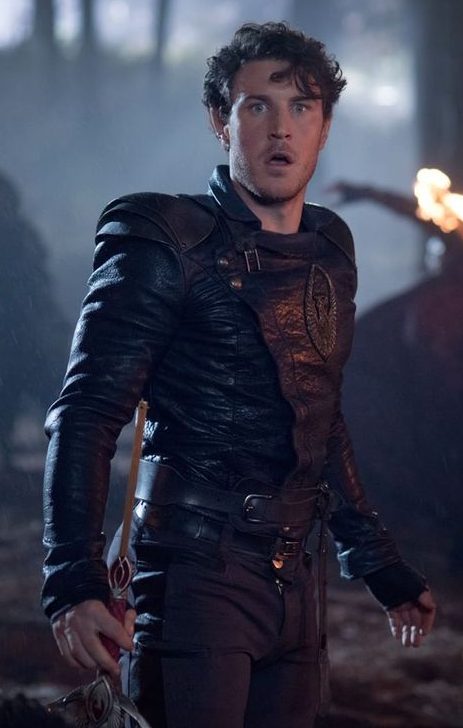
I decided to rivet the back portion of the shoulder strap directly to the jacket under the collar, that way I don’t have to worry about losing it, or it slipping off while wearing the costume. The rivet is completely hidden by the collar. The shoulder strap snaps to the waist belt in the back, and ends with an antique brass rectangular loop near the chest.
For the front half, I riveted a small connector belt behind the waist belt, with a Dee ring on the end (also repurposed from the original coat). The front portion of the shoulder belt snaps onto the rectangle loop, tucks through the Dee ring and connects back to itself using a Button Stud from Tandy.
The Pauldrons
The next alteration to the coat is the shoulder pauldrons. I tried using the cloth pauldrons as my temple, but it didn’t work well. They are too small, which is why they don’t scale over each other well. Also the leather I am working with is WAY thicker than the fabric. So while the original top pauldron was about 8-9 inches wide, the leather one is closer to 12-13 inches! I made some templates out of poster board, and once I was happy with them, I made the finished pieces in leather. These are riveted to the jacket in 3 places, near the armpit on the front and back (just like is visible in the show), but I also put another rivet up near the collar. They keeps the pauldrons flared open like scales, and keeps them from flipping over my shoulders.
The Griffin
My original plan was to hand-tool a piece of leather to make the emblem. However, that would take a lot of time, and look a little rough compared to the show, in which the Griffin 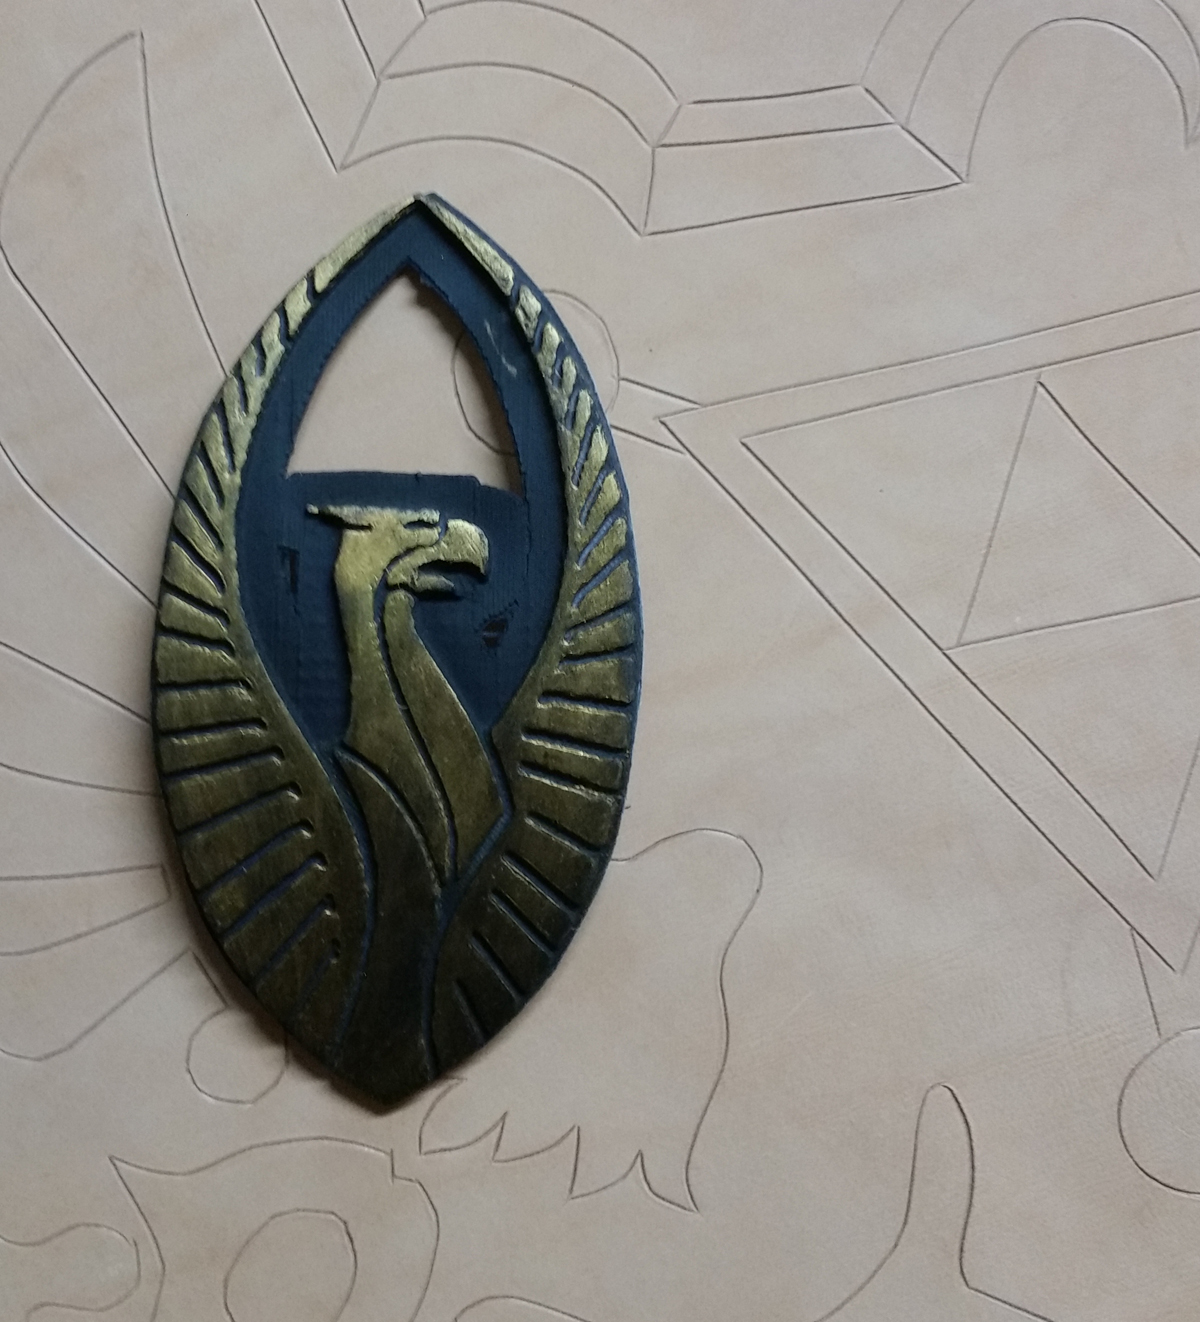 looks cast in metal. I asked a friend of mine with a 3D printer to see if he could make something for me. And well, as always, Scott was able to do some fancy stuff. He was able to take a simple black and white 2D image and turn it into the embossed logo you see to the left (with a Hylian Shield template ready to be tooled in the background).
Soaking the emblem in near boiling water, I was able to gently bend it into a curved shape that will contour to my chest. Once it cooled, it is rock solid again. I then sanded the surface to remove the typical rough surface common to 3D printed objects. At that point I spray painted the griffin black with some P3 Primer, and then dry brushed some metallic gold paint over the raised areas. Done and done. Now I just need to figure out how to mount it to the jacket.
Mounting the Griffin
If I were to do this costume again (or for anyone that wants to replicate this costume), I would ask the jacket company if they could make the jacket without the griffin patch or the spoon shaped patch on the front of the jacket. Those are not necessary if you are fixing up these portions of the jacket, and would make these modifications so much easier.
So a quick trip to Jo-Ann’s, an I got some black faux suede fabric that matches the jacket quite well. Laura is going to sew a patch that will cover up all of the holes in the jacket, and I will mount the griffin on that patch. Obviously this is not screen accurate, but neither is a bunch of exposed needle holes from removed stitching. 😛
This is where I am as of February 2nd, 2017.