Article and costume by: Elise Johnsen
Using Aradani Legend Ears
Instagram: https://www.instagram.com/
Youtube: https://www.youtube.com/
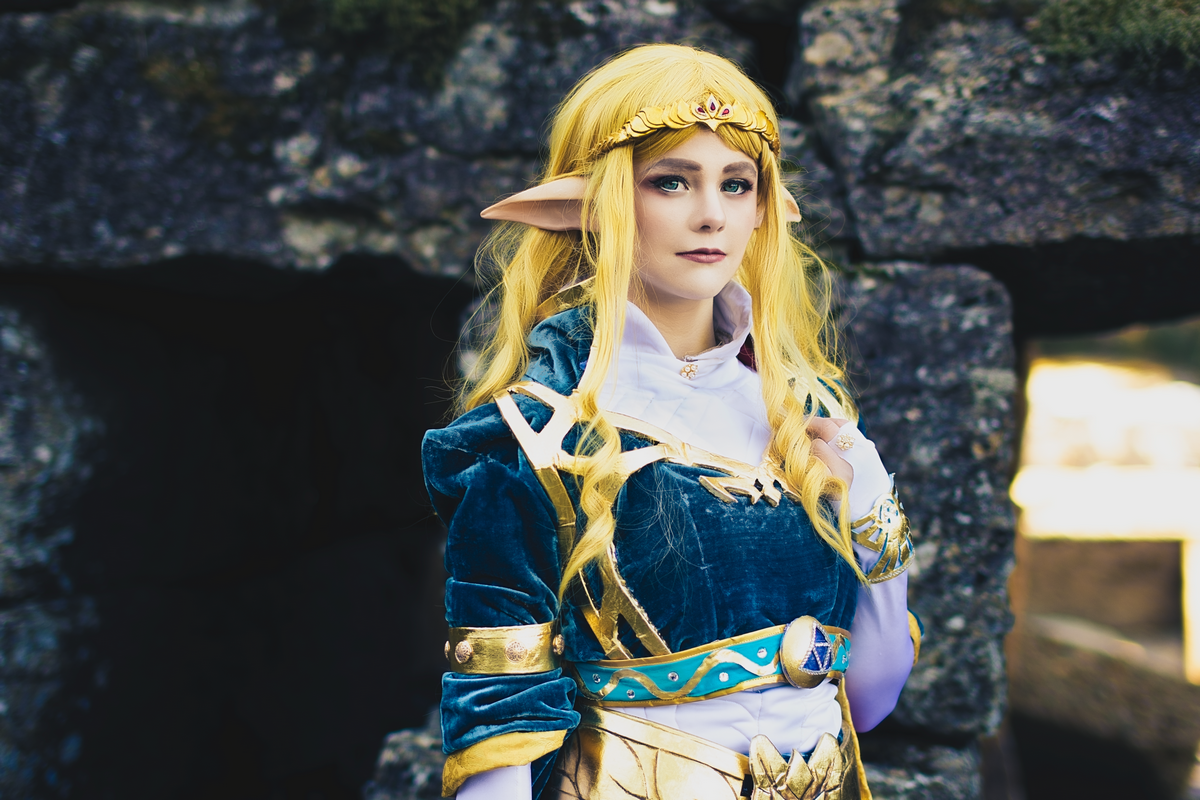
The Legend of Zelda franchise has always been dear to my heart, and when I saw the trailer for the new game, Breath of the Wild, I instantly knew that I had to make a cosplay from it!
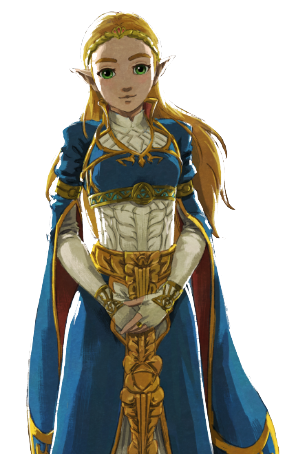
I’ve always wanted to do one of Zelda’s outfits, and once I saw her in this game wearing this beautiful royal gown, I knew that this was definitely going to be my next project. It was so pretty and it had so many fun and interesting techniques that I could try out and play with. I took a lot of progress pictures, and decided to make this little article, hoping this will help anybody who is either making this, or just wants to hear about my pain and struggles- ummm I mean my beautiful and educational journey with the making this costume!
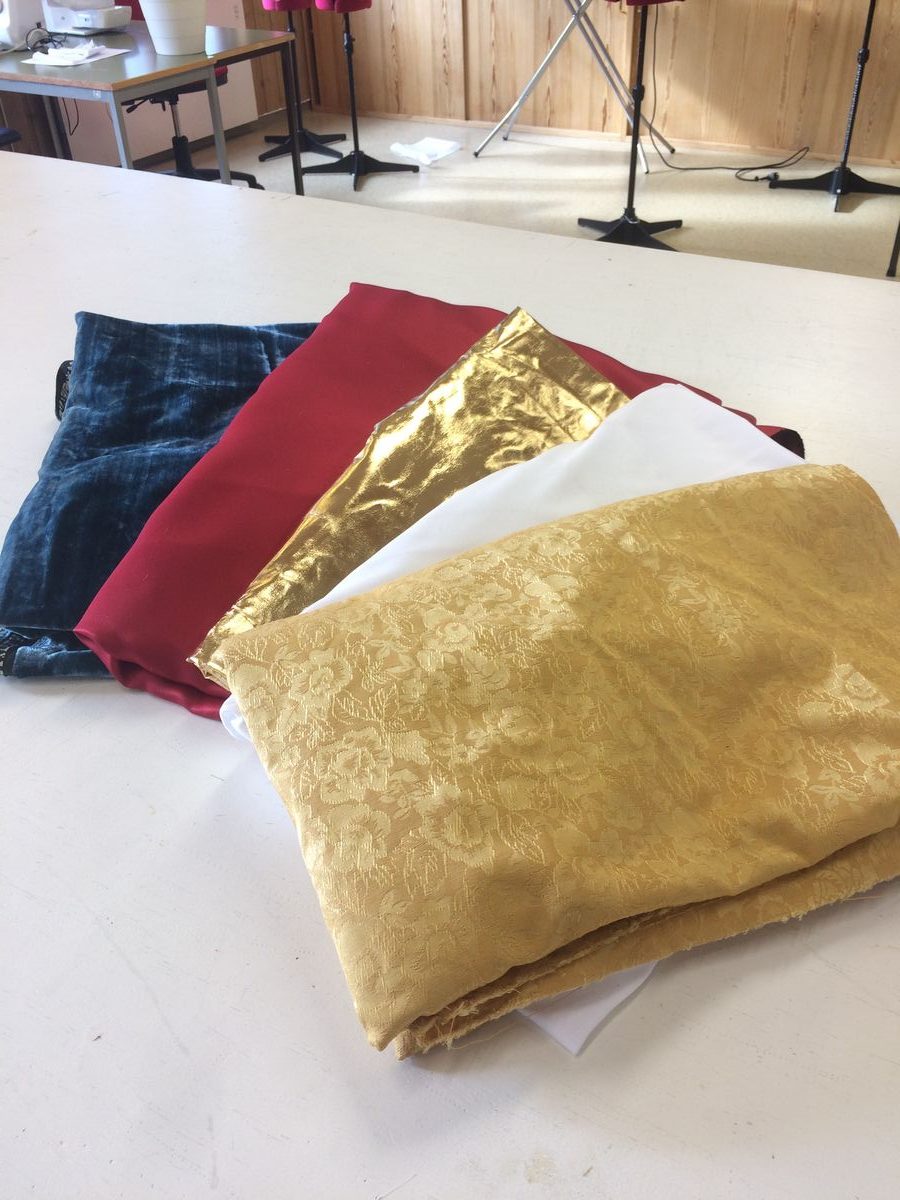
The Fabrics
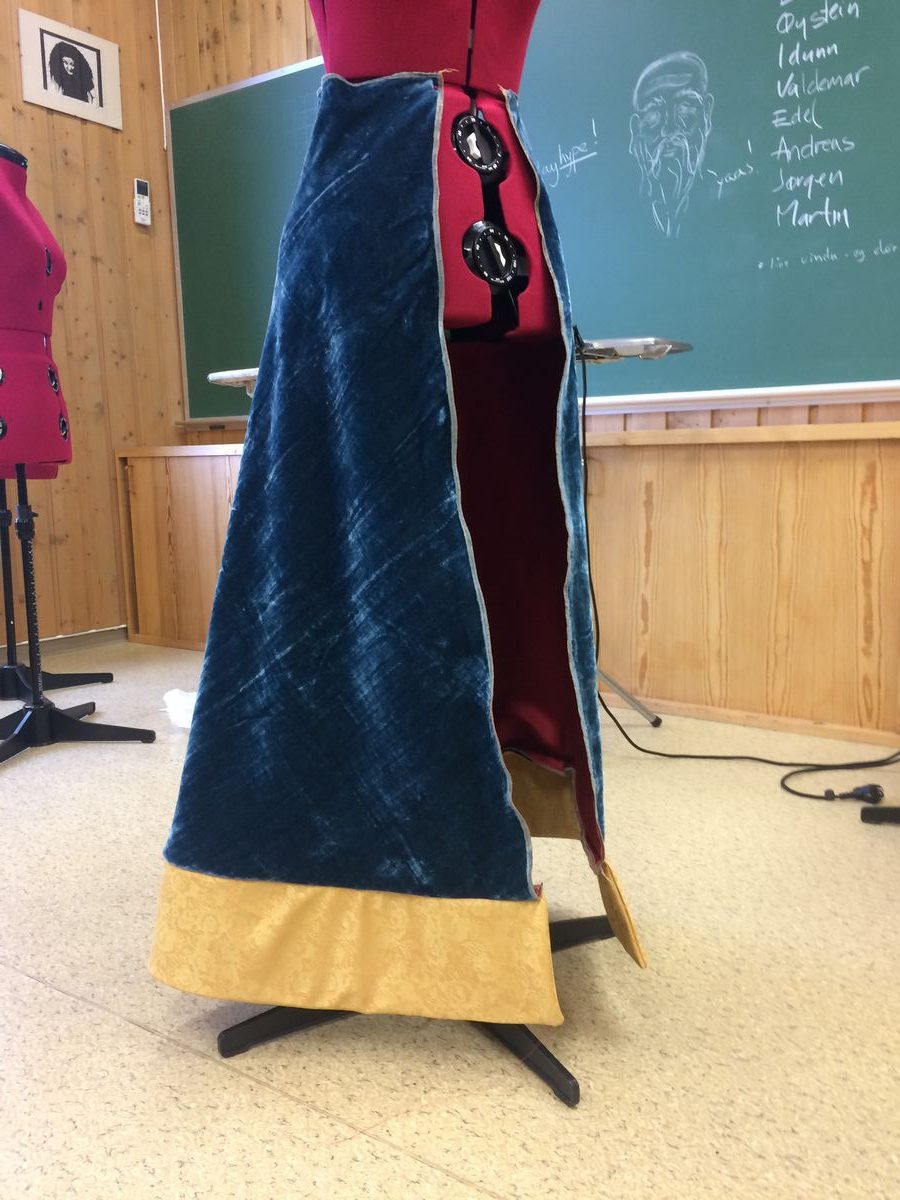
I started doing research on everything on the costume. I wanted the gown to have that expensive kind of feel, since you know, she’s a princess after all. I ended up with using a type of velvet, it was a thick type of fabric, and it looked absolutely beautiful in natural light since it had this little shine to it. I also ended up going for a soft stretch fabric on the white part on her upper body, a white chiffon fabric that had these small pleats in it for the skirt, and an extra layer of satin under it, since the chiffon was a bit see through and satin is a very comfortable and soft material to wear.
On the inside of the dress I used a nice red satin, and I also bought some gold stretch for her tabbern belt thingy. Lastly, I bought some gold fabric with some interesting flower details on it, which I used for the bottom of the dress. You can’t really see the details unless you go up close, but it looks really fancy and fit the style of the costume perfectly.
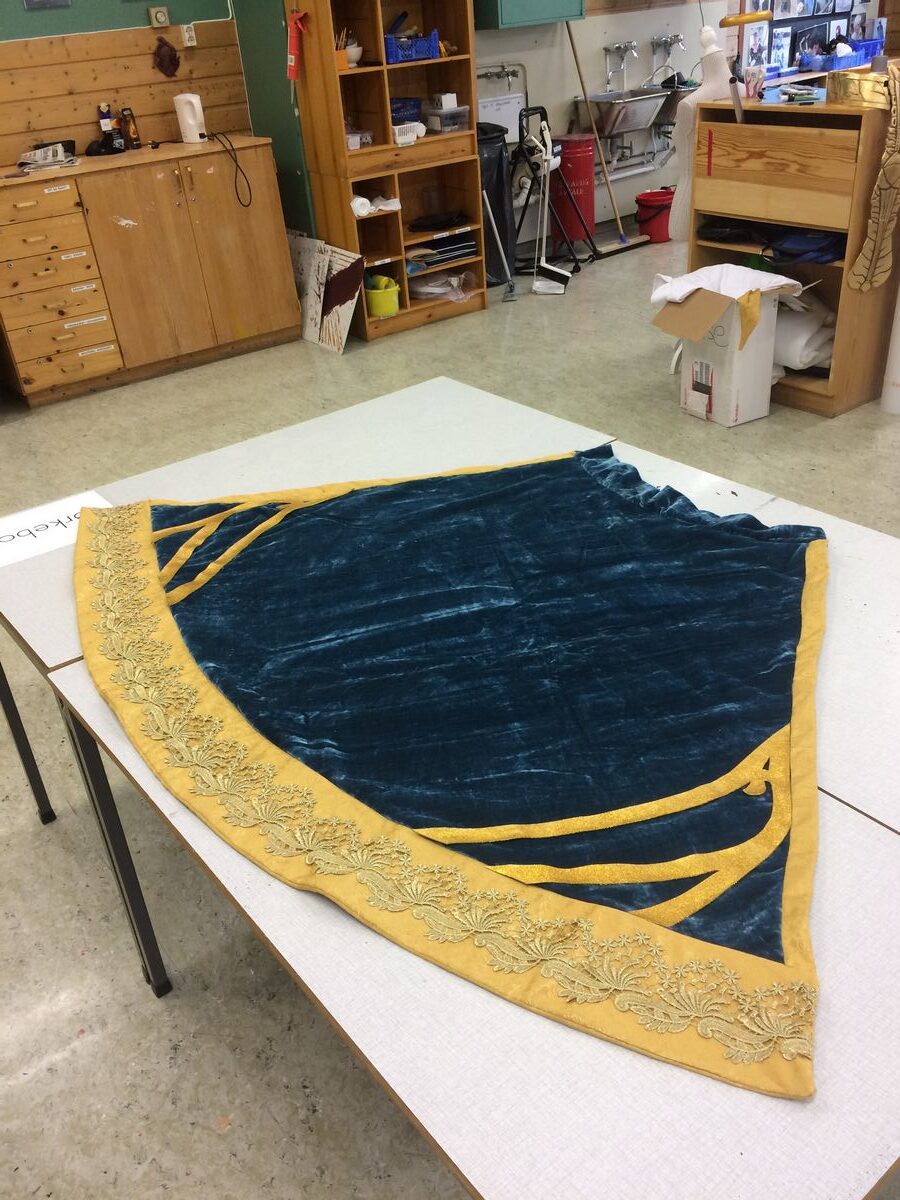
The skirt
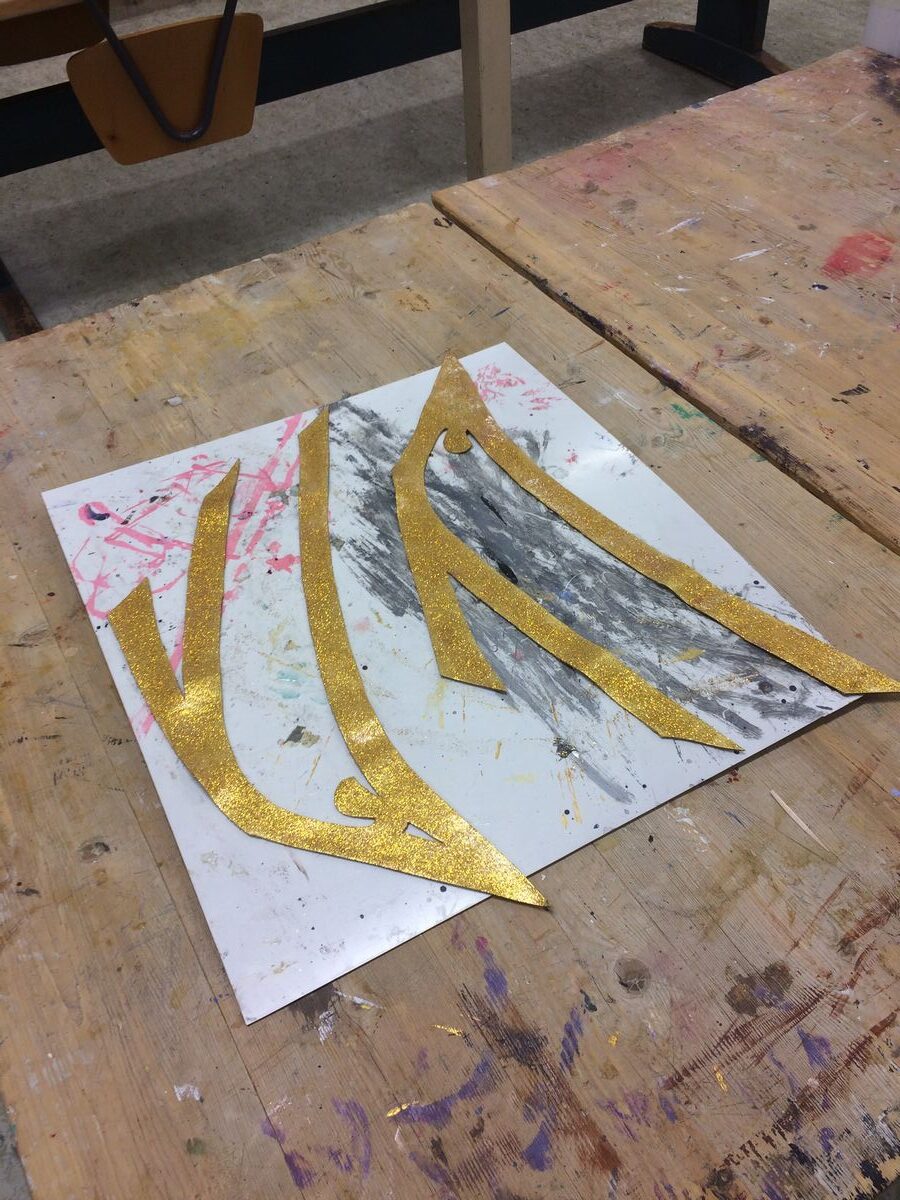
I made all the patterns for the gown myself by measuring and drawing free hand. The skirt consists of a half circle skirt, and I made some bias tape out of the gold fabric I bought. The bottom of the dress has this boarder which looks thicker than the rest of the dress, so I filled that part with some 2mm foam to get the right shape and thickness, and it turned out really well! I also hand sew some lace on there to resemble the criss cross pattern she has. On the corners in front of the dress, she also has these gold swirls and lines, so I painted some fake leather gold, and I also added some gold glitter to it, which ended up looking really pretty in my opinion!
The under skirt
The under skirt consists of two white fabrics. The first is the white satin, which is sown in with the softest side to my body, so it’s really smooth and comfortable to wear. The second fabric is the pleated chiffon. The pleats stay on the fabric so well and it gives a really nice dimension to the dress. The pattern is super simple, I just cut a long rectangle which I added a waistband with an elastic, so it’s really easy to get on and off and really comfortable.
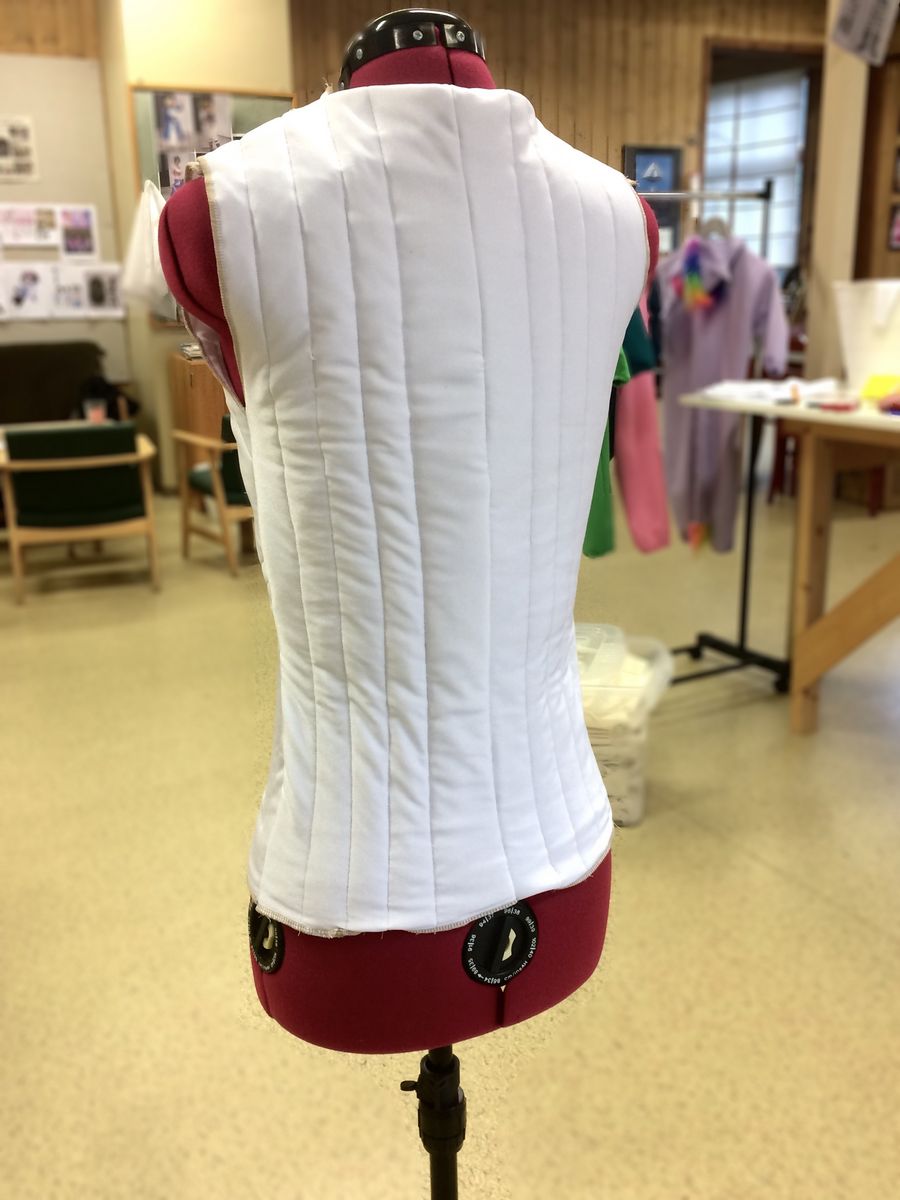
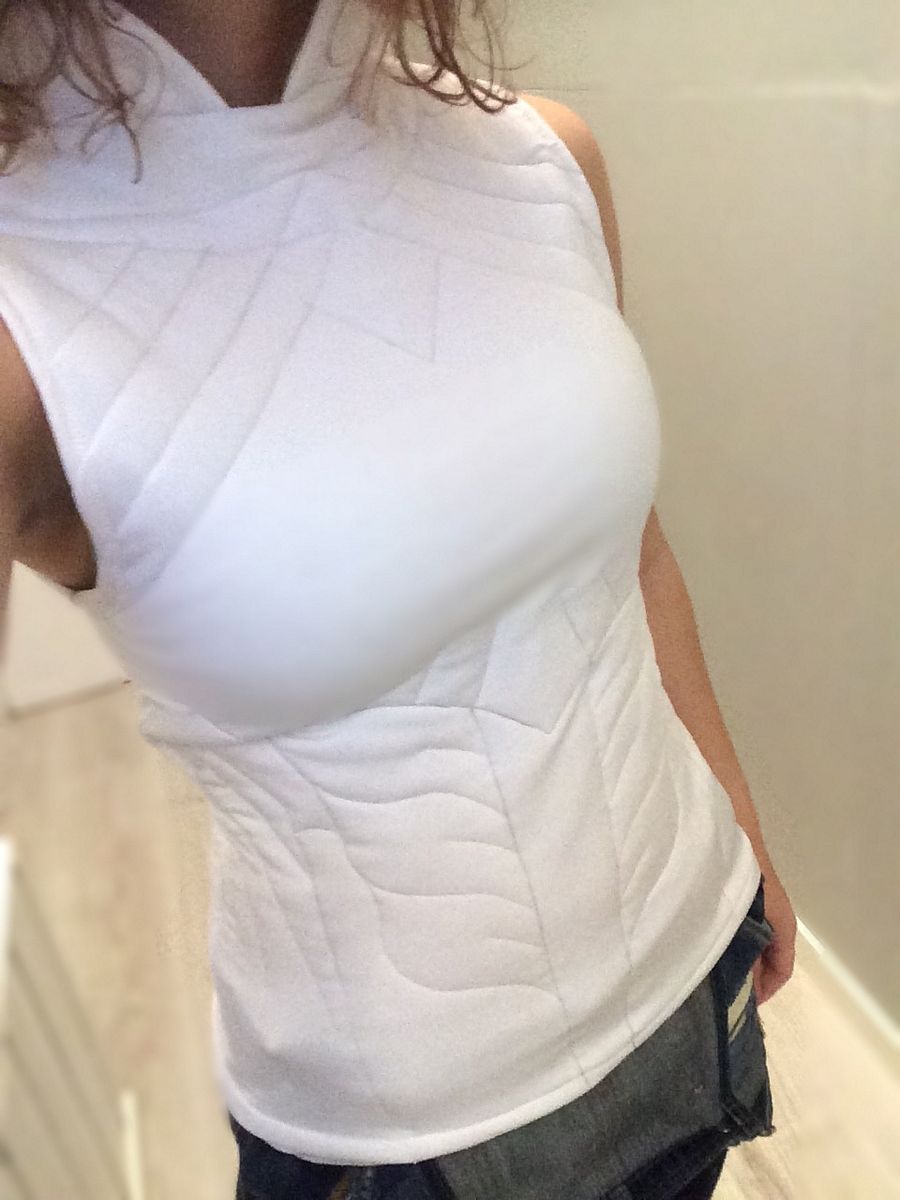
The white top
The white top was so much fun to make! On the design, she has this quilted pattern on the front and the back, so I sowed together two pieces of the fabric, and put some of that thin cotton type of fabric in between to give more dimension when I was going to sow on the pattern. I drew the pattern design on some paper, pinned it directly on the top, and followed the lines with my sowing machine. When I had sown all the lines, I ripped the paper off, and the pattern looked perfect on the top! It was just like drawing with a sowing machine, and it was so much fun to do! At the end, I added a collar, and sowed on a little button which had some pearls and gold details to make it look even more “princessy”

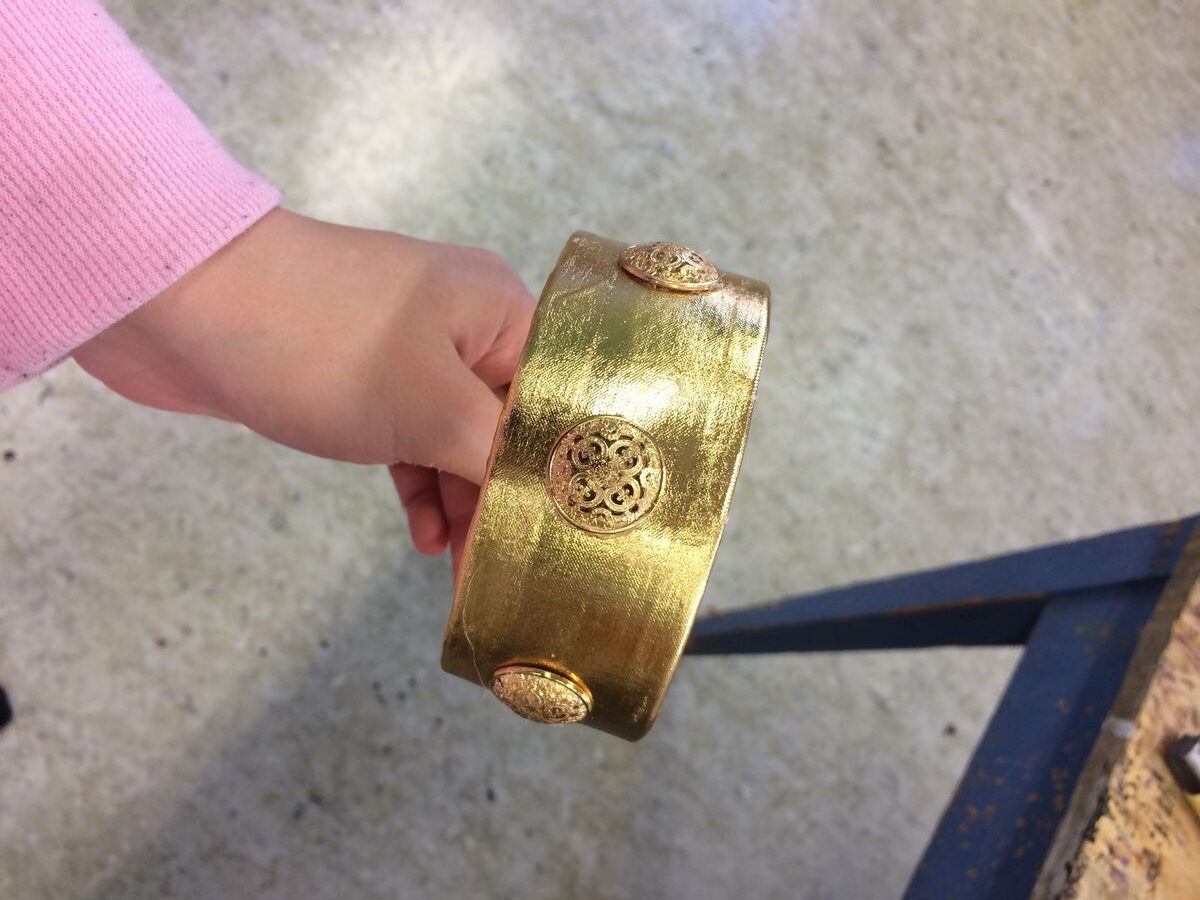
The tabbern
The tabbern is made out of several layers of craft foam, which is covered in the gold stretch fabric. I drew out a pattern on some paper, cut it out in the foam, and just glued it directly on the front and the back. It was really hard to get the fabric to get all the small details and to avoid getting wrinkles, but I think the result ended up quite nice. I also painted on some shadows with warm brown tones so that it would get more dimension. I fasten the belt with some Velcro in the front, and it stays on really well!
The blue top
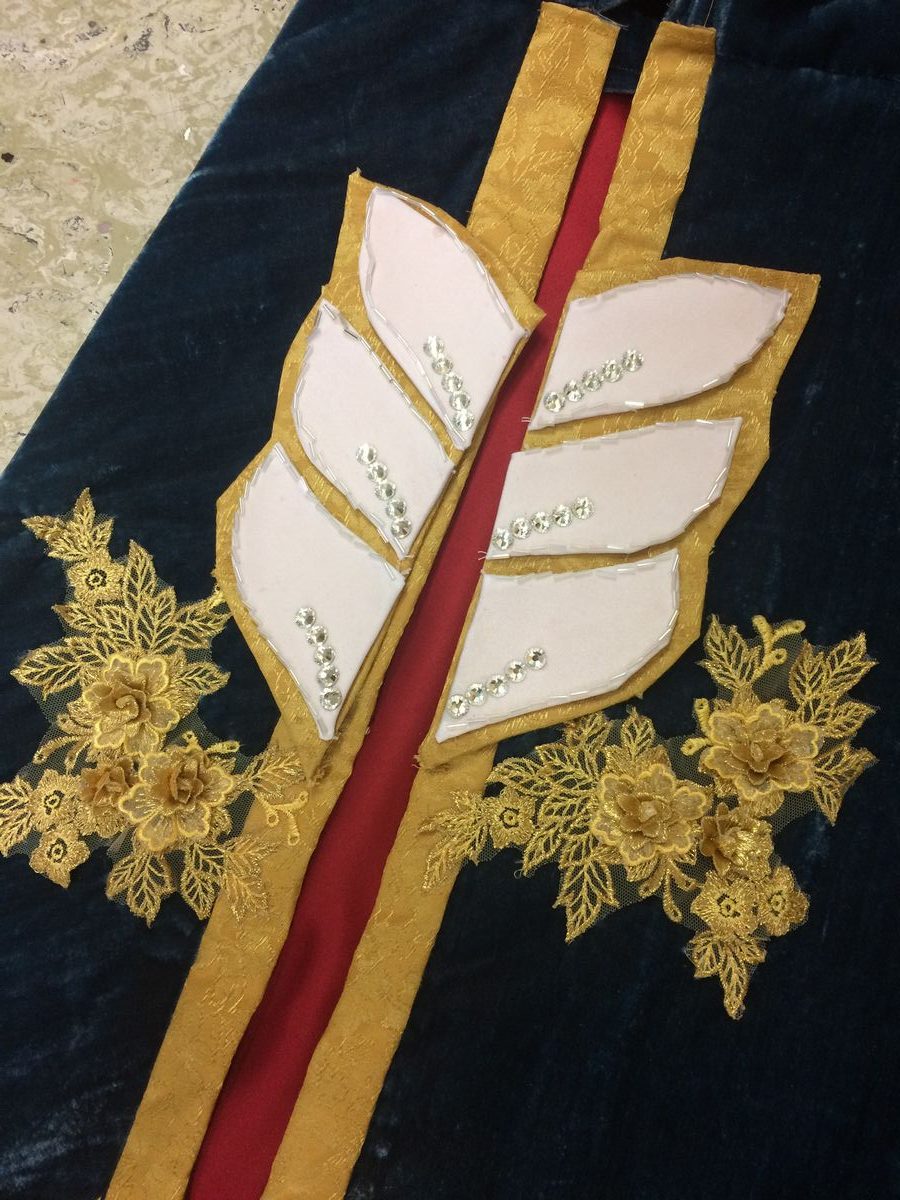
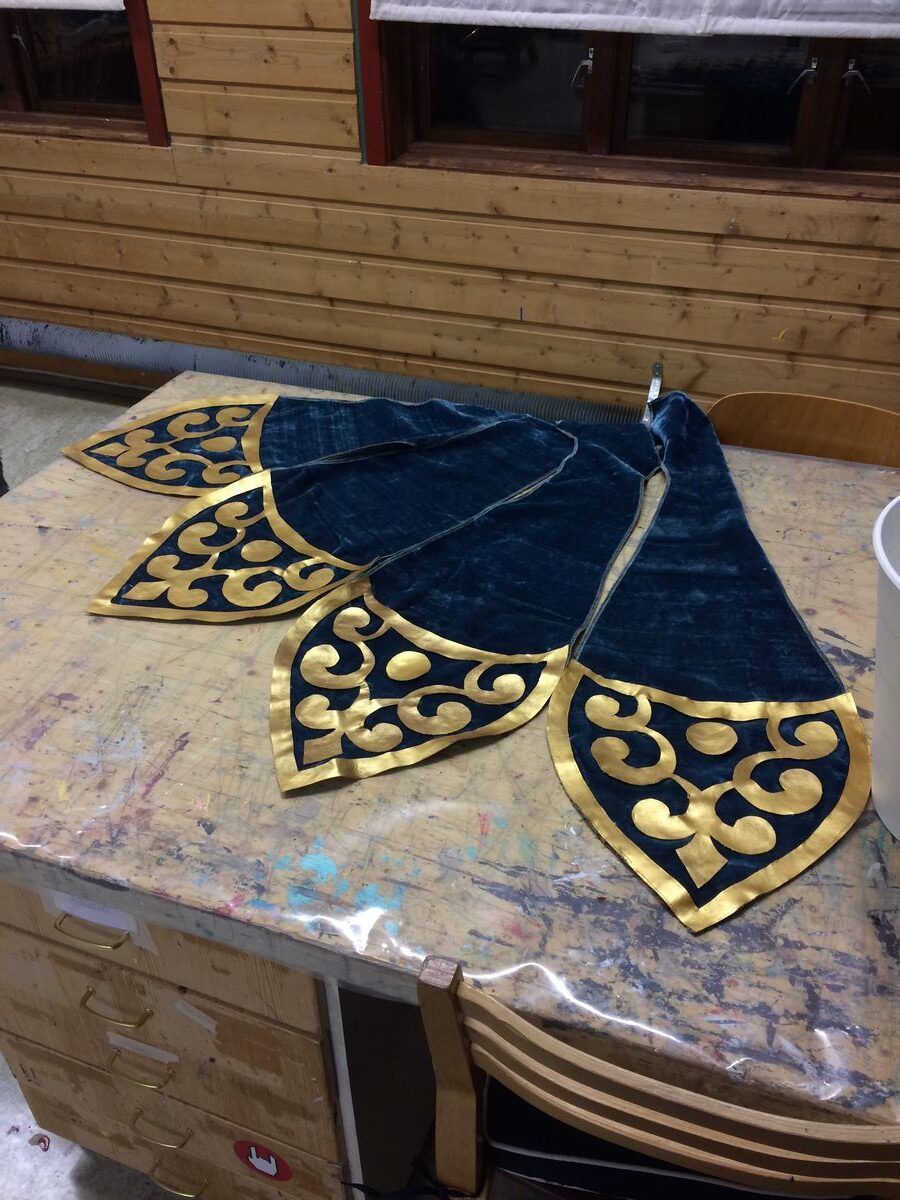
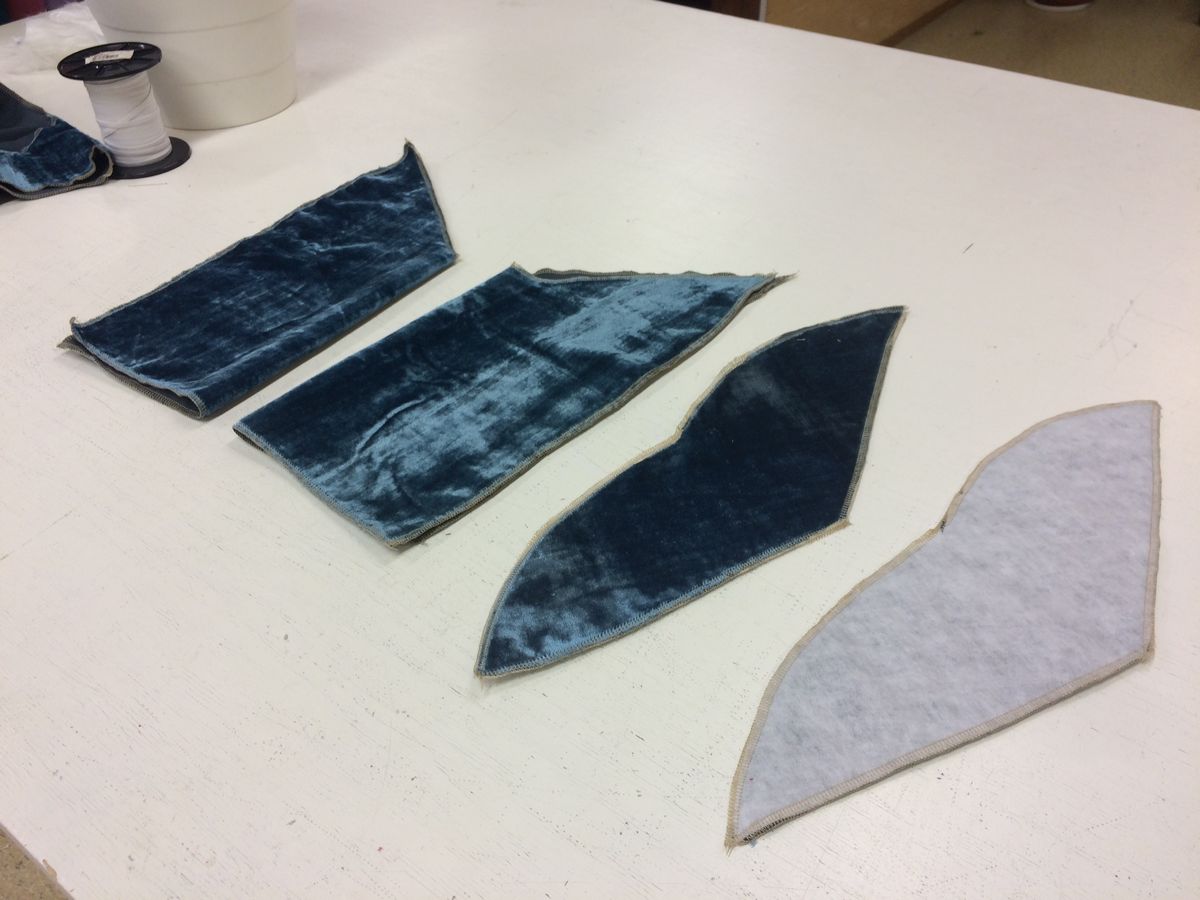
This was so much harder to make than I thought it was going to be! As always, I started making the patterns, made a mockup, and then started on my fabric. It has the same red satin fabric on the inside, and has these big long flops on the arms (which is really practical because they can be used as pockets ;D) The hardest thing was probably the gold details on her torso.
Since it looks kind of 3D on the design, I decided to make them in 5mm foam, which I then glued on the same gold stretch fabric as the tabbern belt. I directly glued it on the blue fabric, which was really scary since I hadn’t done that before, and I didn’t really knew if it was going to work or not. Luckily, it ended up looking really nice, so I was pretty pleased with that! I then sewed on the gold bias tape I had made earlier, and then attached some more gold lace on the sleeves.
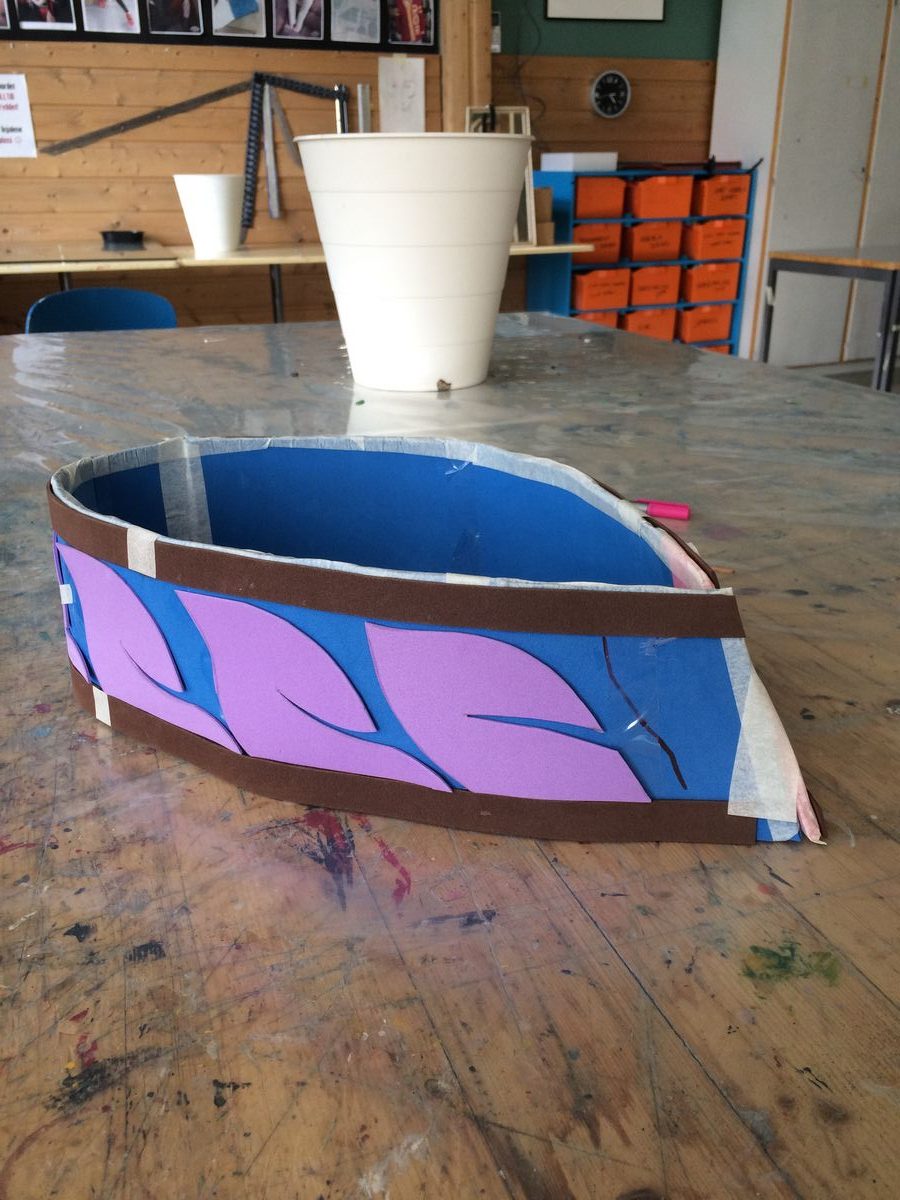
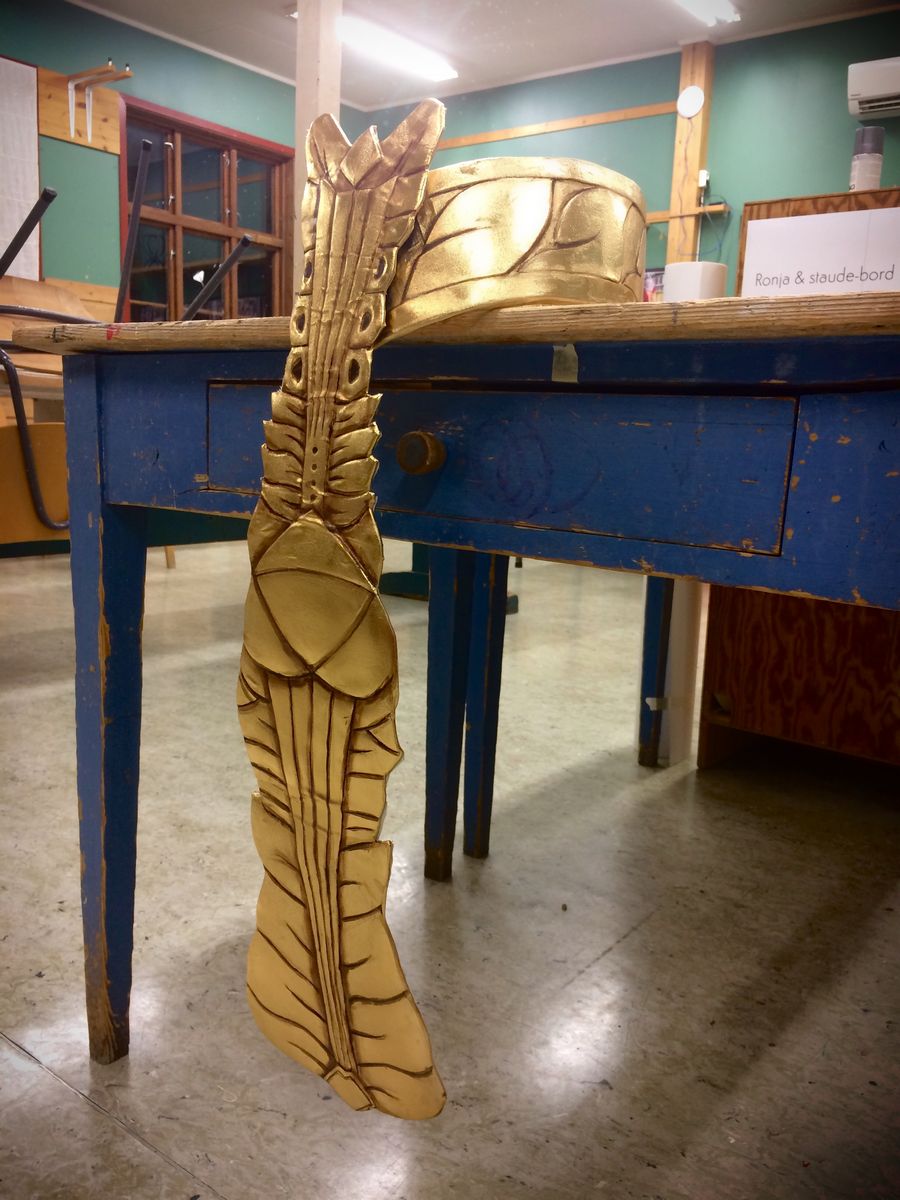
The belt
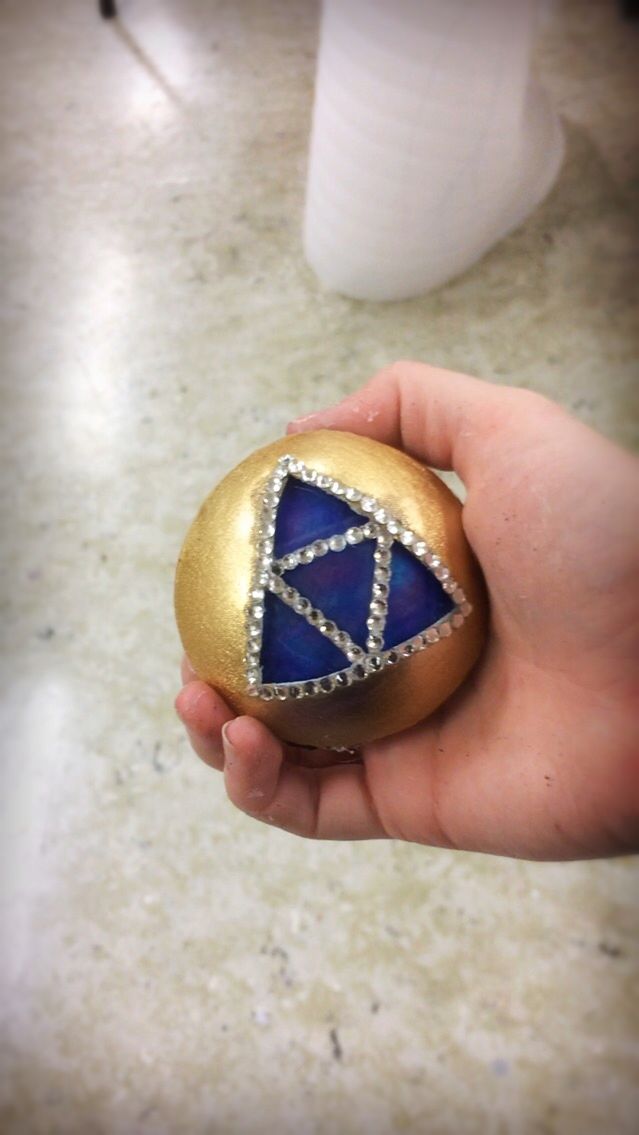
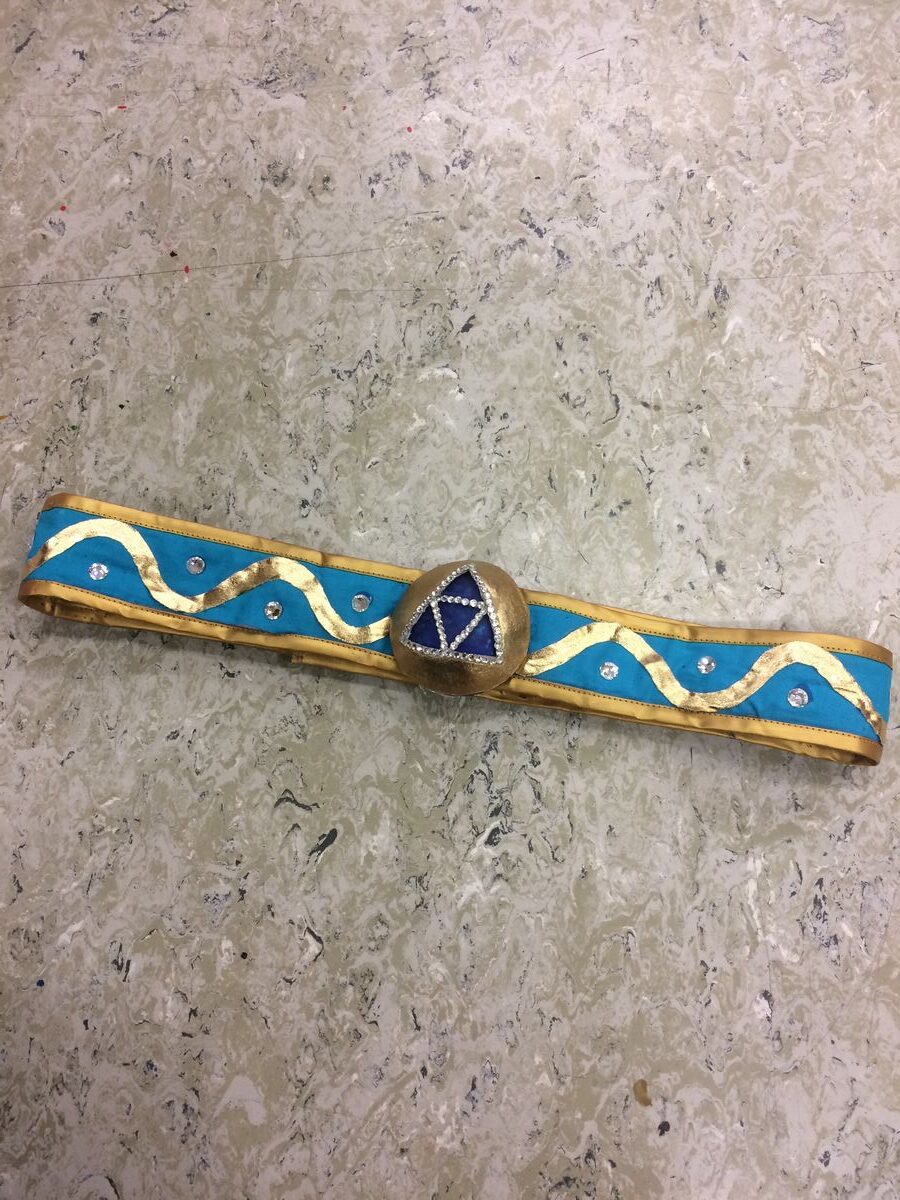
The belt she has on the blue top is just made out of some turquoise cotton fabric, with some bias tape on the sides, which I painted to be the same gold colour as the rest of the costume. I also cut the gold stretch fabric in the wavy shape she has, and glued it directly on the belt. I also glued some rhinestones on there for details. The triforce buckle thingy is made out of worbla, which I covered in the same stretch gold fabric I have used on the rest of the costume.
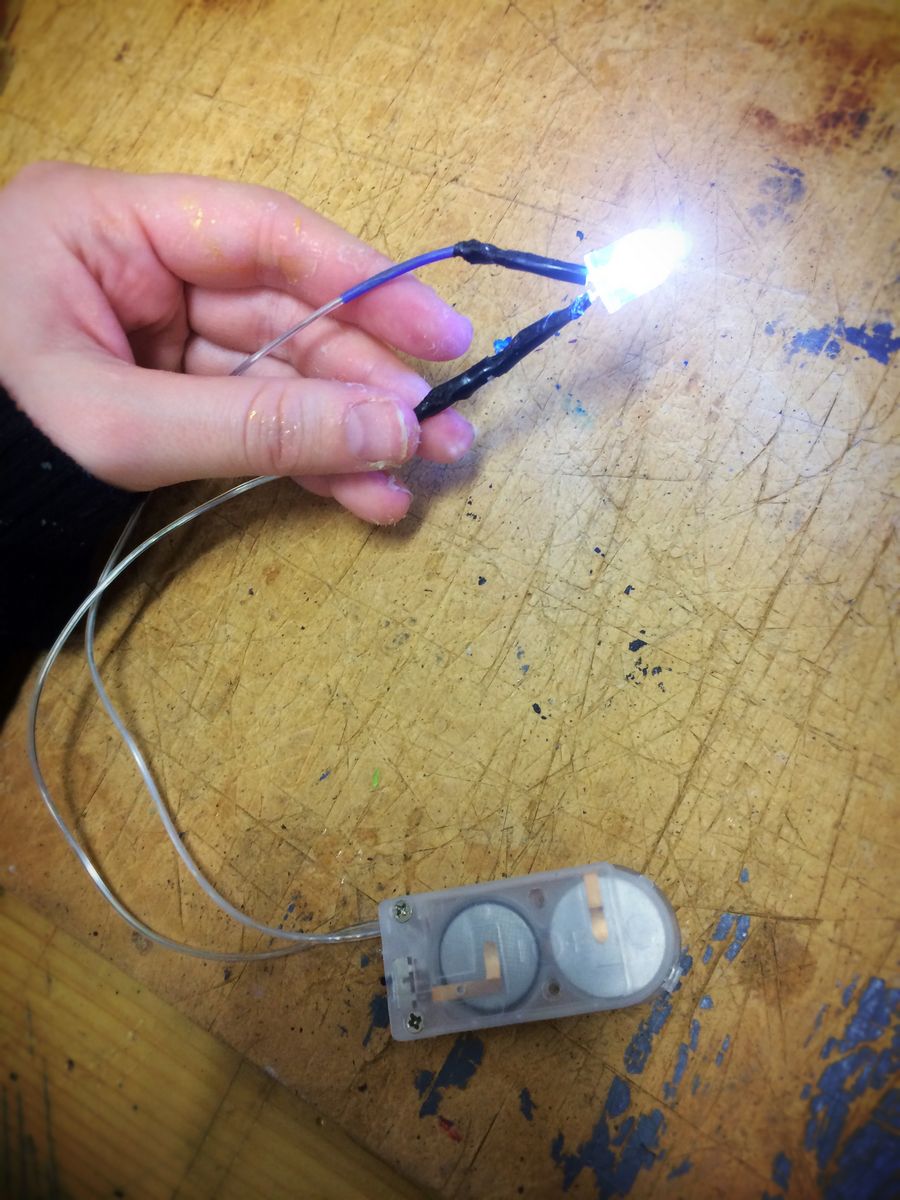
The blue triforce in the center is made out of transparent worbla which I colored blue with glass paint and glued behind the gold part. I wanted to be extra fancy, so I also made the triforce light up by putting a LED light inside! I just soldered a 3v light to a small battery pack, which I hid underneath the belt, the result looked really cool. To make the light shine more evenly, I fastened some aluminum on the back, so the light spreads more. I also put some cellophan in there as well, and I glued some of the thin, clear type of foam sheets between the light source and the blue part it was going to shine through. That way, the whole triforce glows evenly.
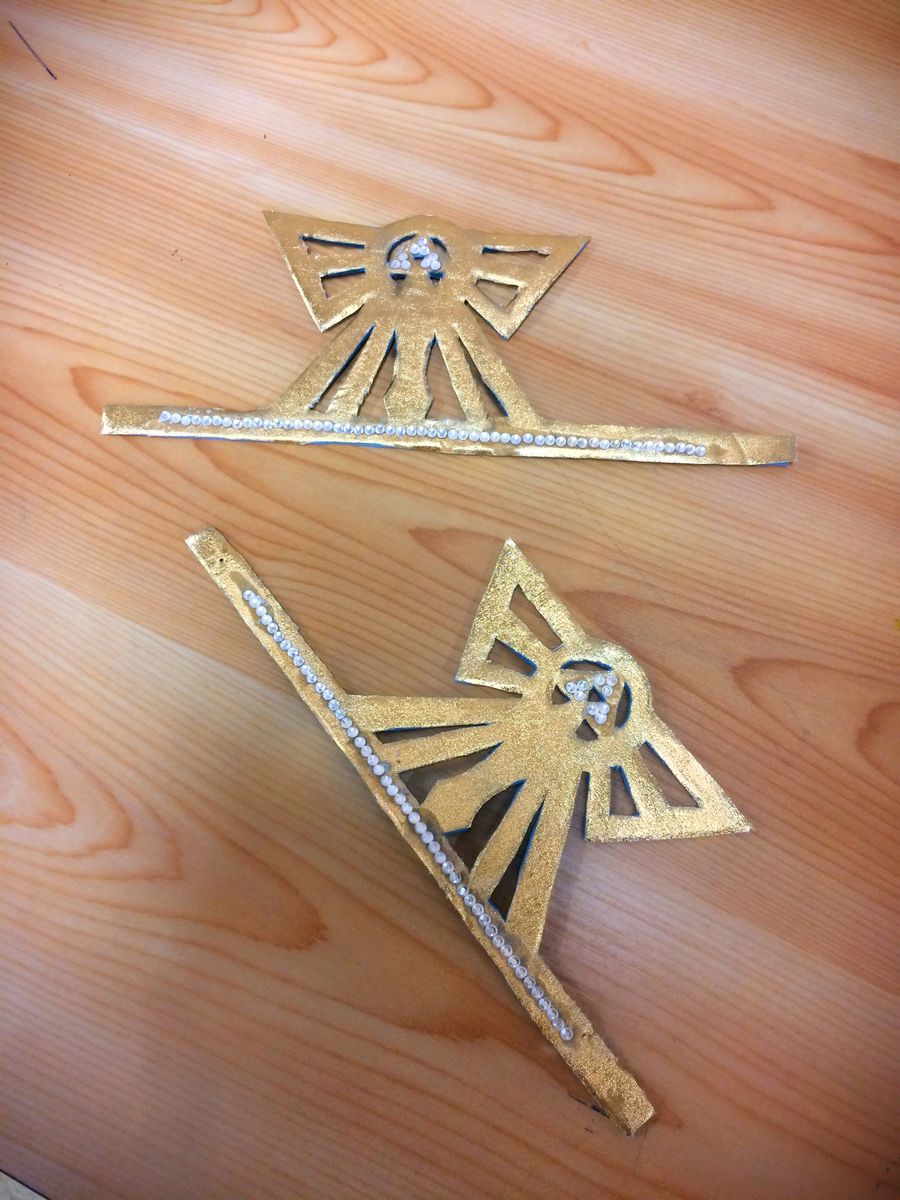
The gloves
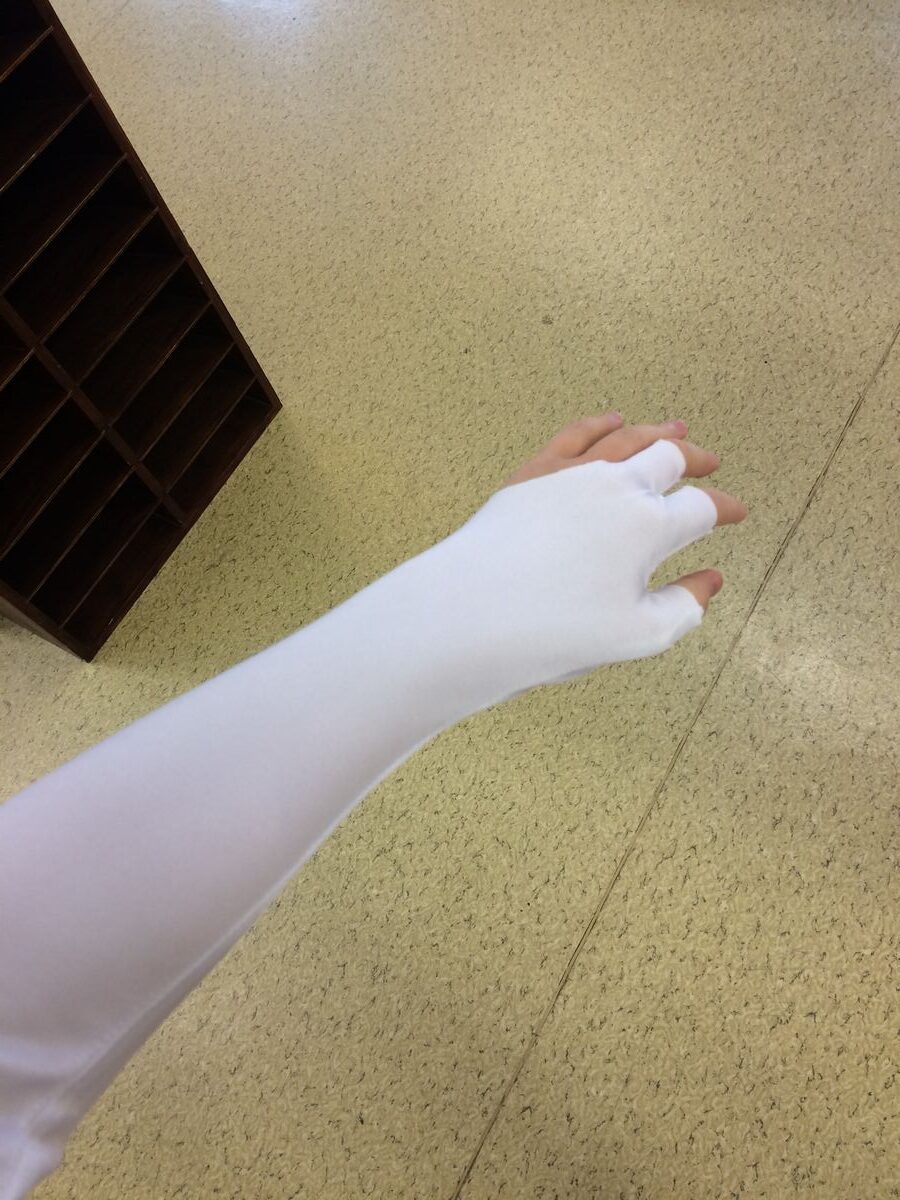
The gloves are made out of the same white stretch material as the white top. They were pretty easy to make, I just made a pattern, sowed it together and added the same button with the pearls on the tip of one of the fingers to resemble the ring she wears. She also has these gold triforce symbols on the back of her hand, so I made them out of 2mm craft foam which I primed with wood glue and water, and painted them gold. Lastly, I bedazzled them with some small clear rhinestones. She doesn’t really have it in the design, but I wanted to be a little extra and it was such a small extra detail. It ended up looking really nice so I’m glad I did that!
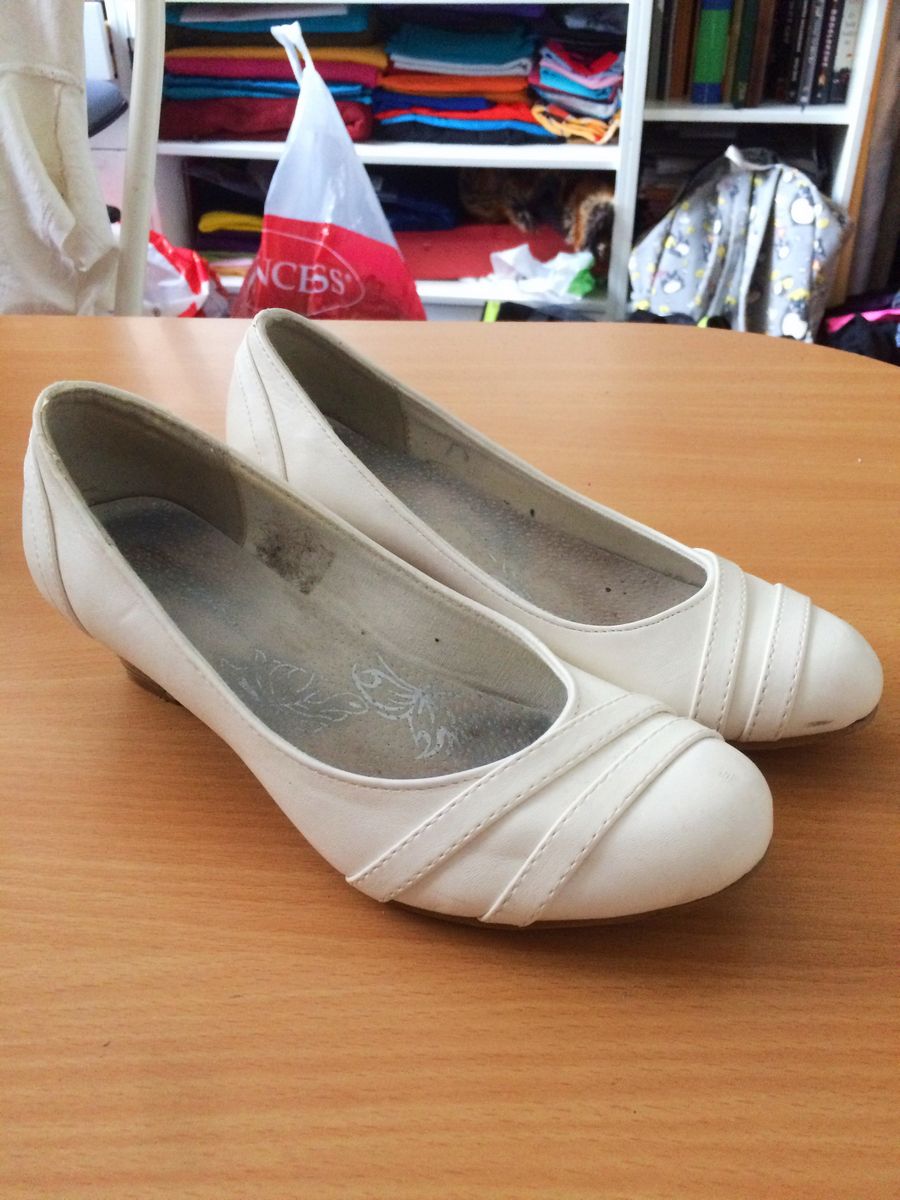
The shoes
I used some old white shoes that I had, and painted them gold, and glued on some of the same rhinestones that I used on the gloves. I also added one of the pearl buttons again, and they ended up looking really cute and they fitted the rest of the outfit. It was really hard to find any pictures of the shoes since they’re barely visible, so I added some details I felt looked good with the costume.

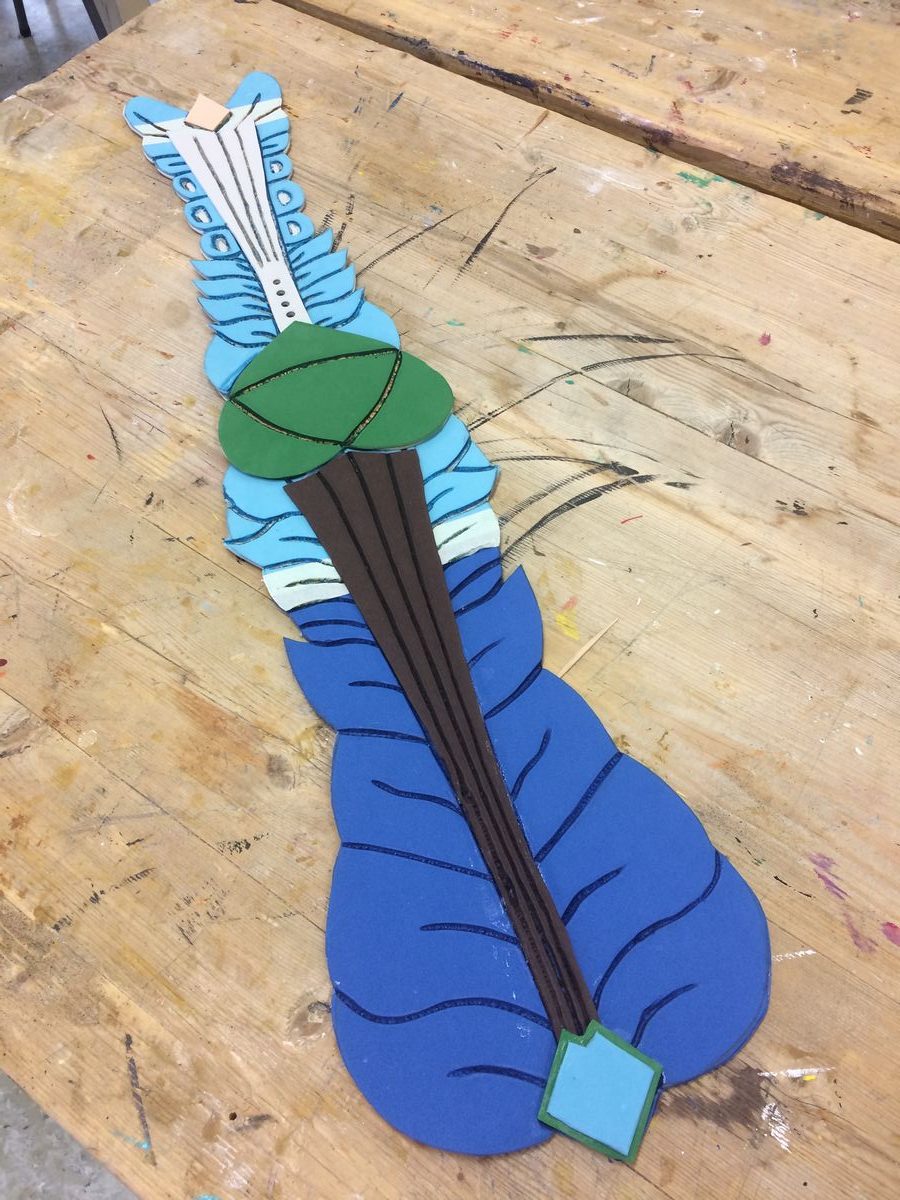
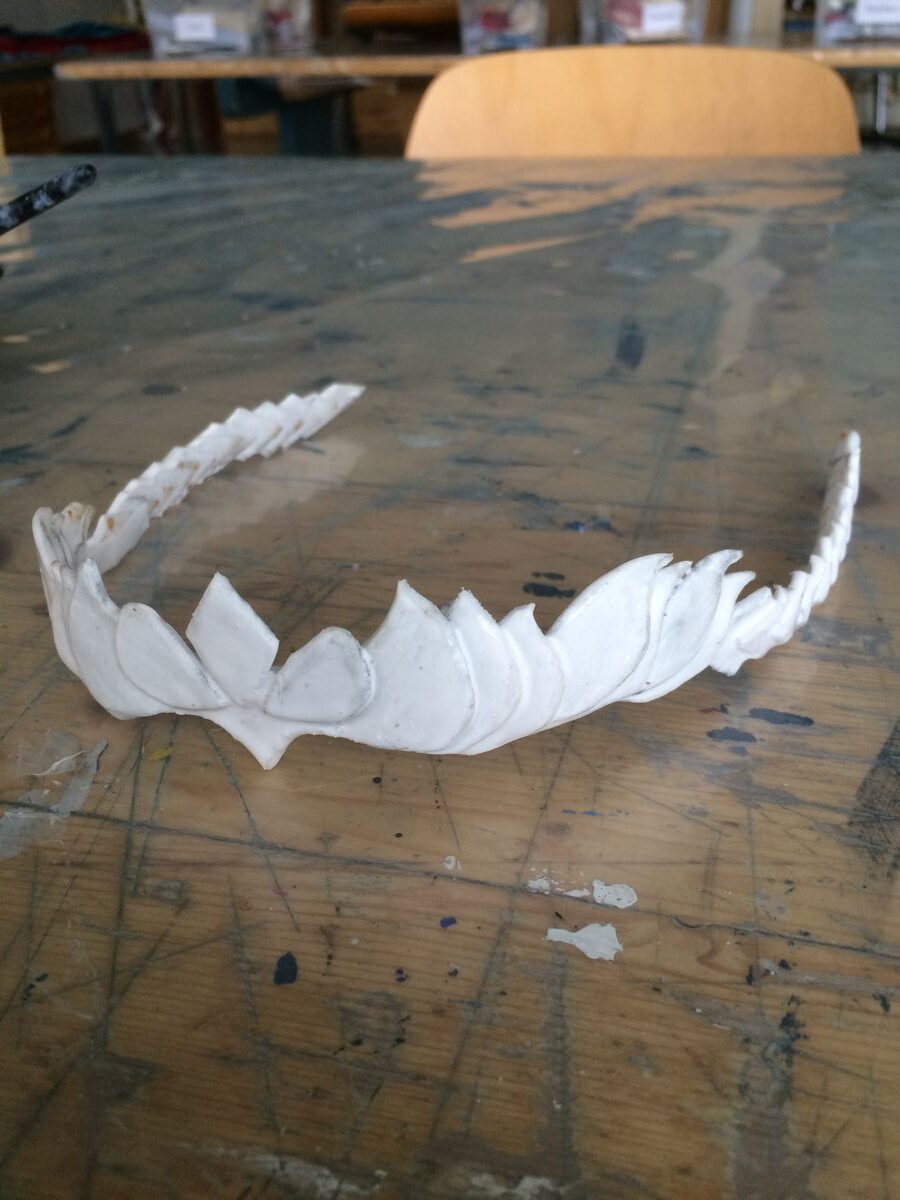
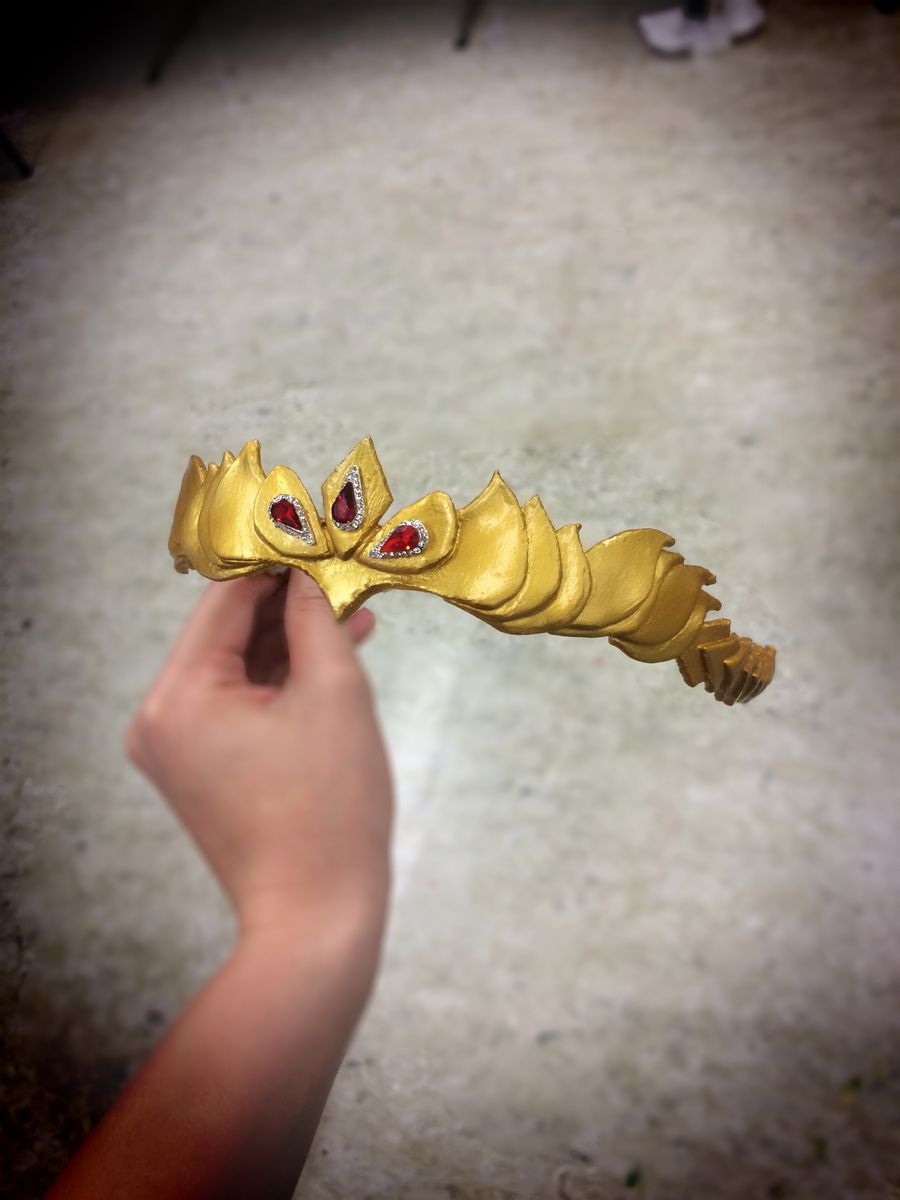
The tiara
The tiara is made out of white worbla, which I then primed with wood glue + water, and then painted the same gold I’ve used on the rest of the costume. I also put some gloss paint on there as well to seal the paint, and to give it a nice “royal shine” to it. Zelda has these pretty, red diamonds on the center of the tiara, so I bought some nice red rhinestones which had these tiny, but cute silver rhinestones on the edge, so I just glued them on. When I wear it, I just use some pros aide or spirit gum on my forehead, and glue it on. It fits perfectly to my head and it stays on all day^^
Lastly, I cut and styled my wig, it just needed a little trim and some curling, but other than that, it was good to go! I have paired the costume with the Legend ears from Aradani Studios, and they fit the costume so well! I love the size of them, they’re really comfortable to wear, and the colour is perfect for me.
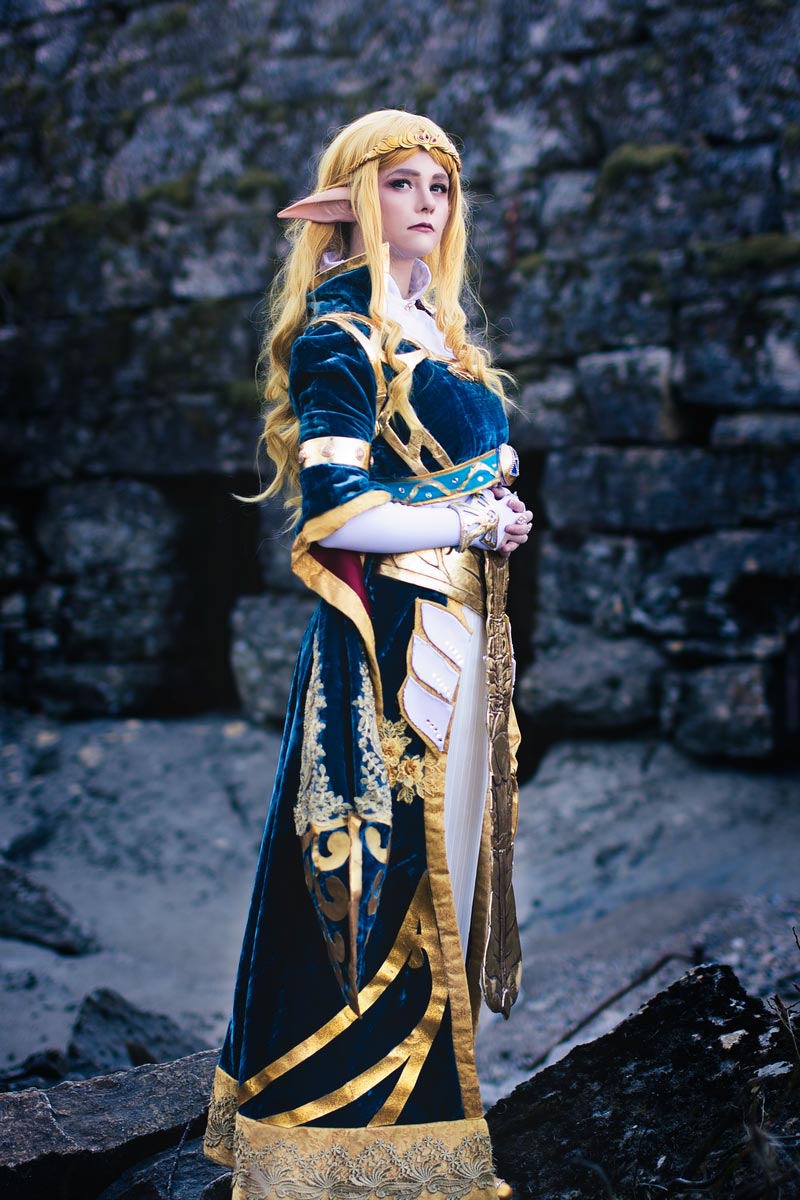
I am really pleased with how the costume turned out, and it was so much fun to make! I definitely met some challenges and I it was a lot of trial and error, but it was so worth it at the end. I learned so much new, and even if I faced some challenges, I managed to pull through. I have received so much lovely feedback, and it really motivates me to keep on making new things! I never get tired of cosplaying Zelda, and I’ll definitely going to make more cosplays of her in the future!