 So as I work on my costume for Link from Zelda: Breath of the Wild, it is time to remake my fingerless Link gloves. The first pair that I made for my Twilight Princess costume were made from leather gloves from Wal-Mart, but unfortunately they were only available around winter.
So the biggest concern with making these gloves was to prevent the stitching in the fingers from unraveling after cutting off the finger tips. But Mike made a pair of gloves for another costume a few months ago and solved that problem. You can purchase them <here>, or save some money and follow our tutorial. Without further ado, how to make:
Fingerless Link Gloves
What You’ll Need
1 pair of light color, leather gloves.
Scissors capable of cutting leather, or a good razor blade and straight edge
medium to dark leather dye
dye applicators (sponge brushes from Home Depot work too)
Fabric Glue (or super glue may work)
What Gloves to Buy.
One issue with the winter gloves from the Twilight Princess costume is that while incredibly soft, they weren’t very rugged. They looked broken in very quickly. I originally chose them because they were the correct color. This time though, I started with heavy duty work gloves from Home Depot. I purchased a set of gloves 2 sizes smaller than I normally wear. The glove fit the body of my hand well, but the fingers were too short. But that doesn’t matter, cause I am loping them off.
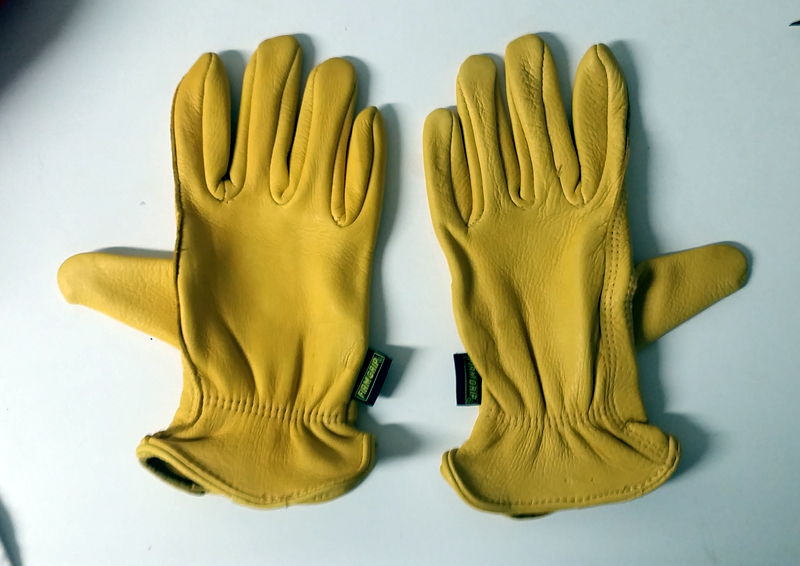
So the most important thing is to choose a pair that fits your hand well, ignoring the fit of the fingers.
While I normally wear a size Large in gloves, in this case I made my gloves from a Small pair. Even these were too big for my sister, so we had to go with a more expensive pair of Deer kin gloves for her. They were size ladies. Which I guess is a size in our modern society…
Cutting off the fingers
Aradani has a very nice pair of leather scissors that makes short work of any leather, and gives a perfectly clean cut. Most likely you won’t own a pair of scissors that could cut through leather, so your best bet is most likely to use a sharp razor. Make sure its sharp, as you want a nice, clean cut.
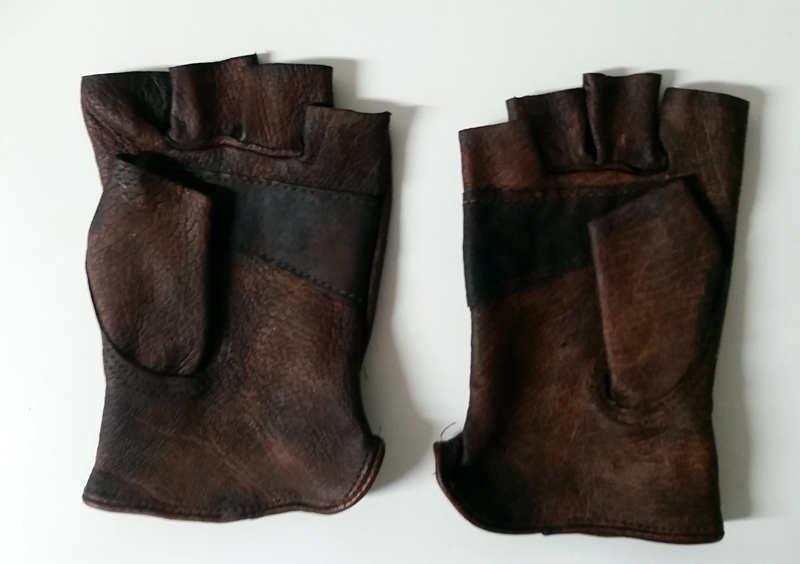
I recommend that your first cut be way to short. Just cut off the tips of the fingers like in this picture. You don’t want to cut off too much!
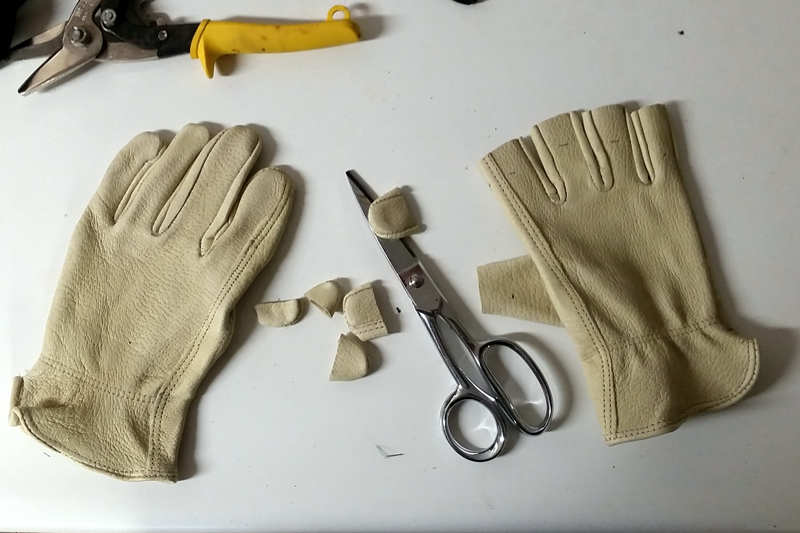
If you look carefully at the glove on the right, you will see pen marks on the gloves. After cutting off the tips, I slipped the gloves on, and lightly marked on the gloves right under the second knuckles on each finger. By making the fingerless gloves stop below the knuckle, it makes the gloves much more comfortable and flexible.

So in this image, you can see how much I cut off in the first cut, and then the additional amount that I cut off on the second pass. Also notice how short the pinky finger is. Most people’s first pinky knuckle lines up with the second on their ring finger, so that means the glove’s pinky will be much shorter!
Also, most hands aren’t symmetrical, so it is just easier and quicker to repeat the above steps for the second glove. Trust me.
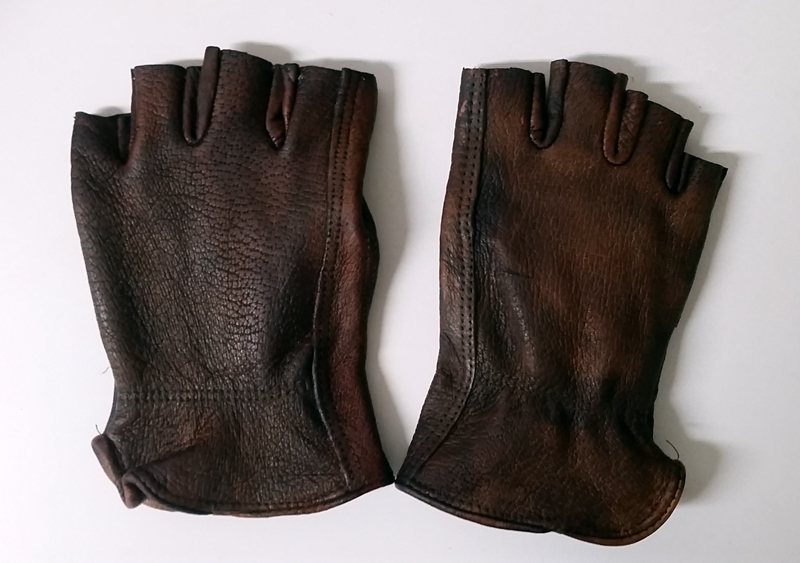
Today is a Good Day to Dye
I recommend dyeing the gloves next. You can try and glue the stitching, but you run the risk of getting glue on the surface of the glove, which will then dye differently that the leather (sorta like wood glue and stain, though with woodworking, you usually have to use the glue first).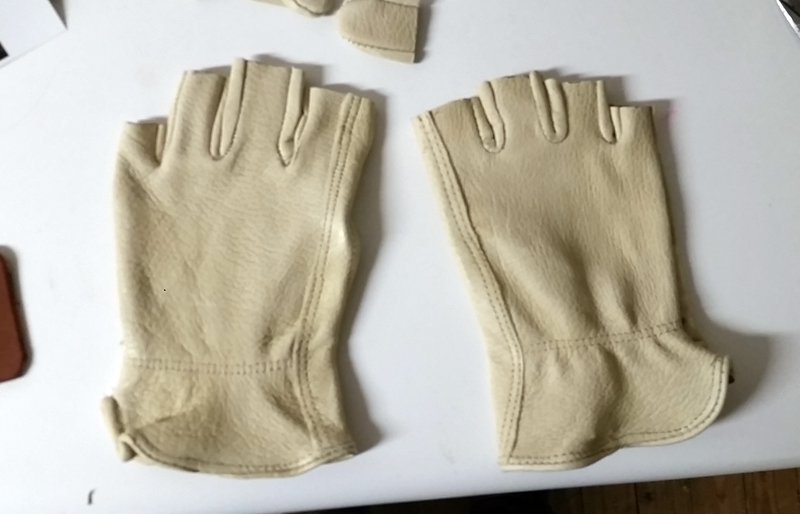
To achieve a nice color, I mixed two colors of Tandy’s Eco-Flo Waterstain. Aradani had a Medium Brown on hand, but it tends to dry very red, and light as well. Normally this is toned down with a nice layering of antiquing. But since I wasn’t planning on using antiquing, I went with a mix of Medium Brown and Black (approx. 70% brown, 30% black).
I applied the dye using a Wool Dauber, also found from Tandy. I wear nitrile gloves when working with leather dye. And after I good application of dye, I typically rub the leather with my gloved hand. This helps rub in the dye, as well as pop any bubbles or froth that is made by the dye (which will leave a funky pattern on the glove is if dries). You can continue rubbing in the dye with the dauber, but I find that usually continues to add additional dye to the leather, thus getting darker and darker. And for some reason, a non-porous surface (gloved hand) gives me better results.
Gluing the Stitches
So this is the step that really excited me in making these gloves. Rather than sewing up every single stitch, you simply glue them shut. I can attest to the problems involved to hand sew leather. Just use glue.
My brother recommended Super Glue, but I couldn’t get it to adhere the leather. Instead I used some fabric glue, specifically Beacon Fabri-Fix. It adheres pretty quickly, and dries solid overnight.
Carefully pry back the edge of the seam, put a small drop of glue, and squeeze gently. I glued all the stitches, and then just left the gloves overnight.
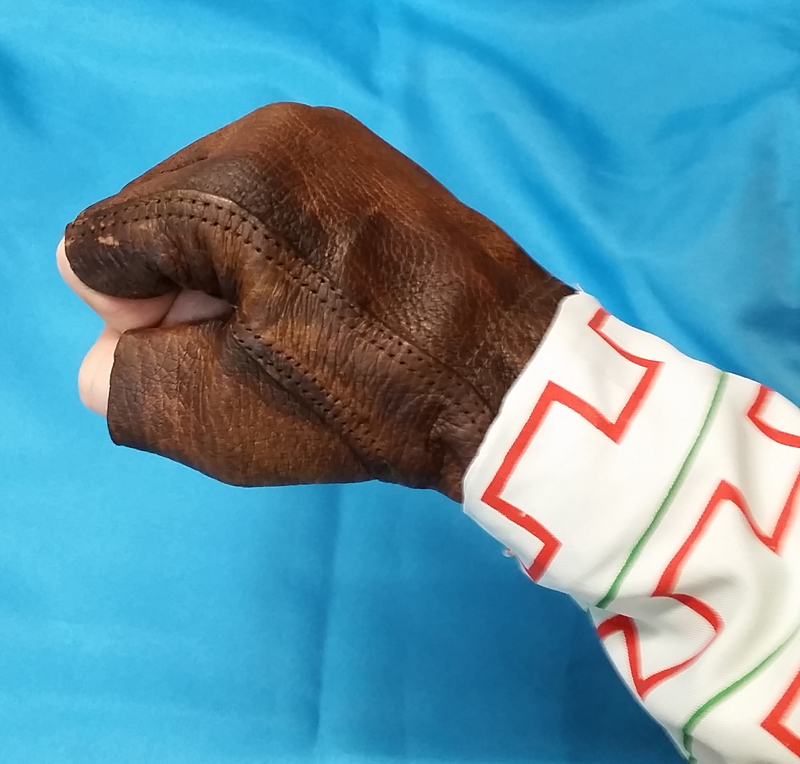
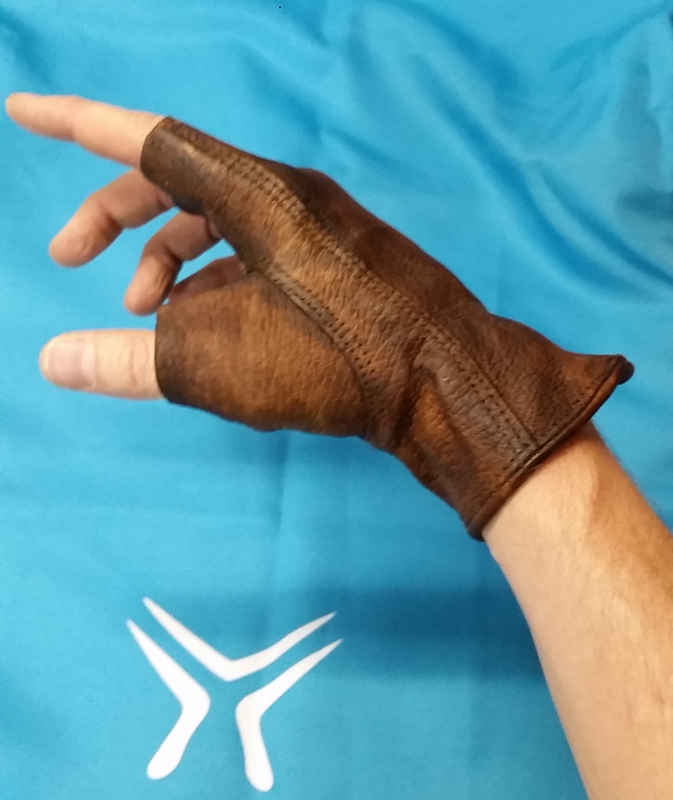
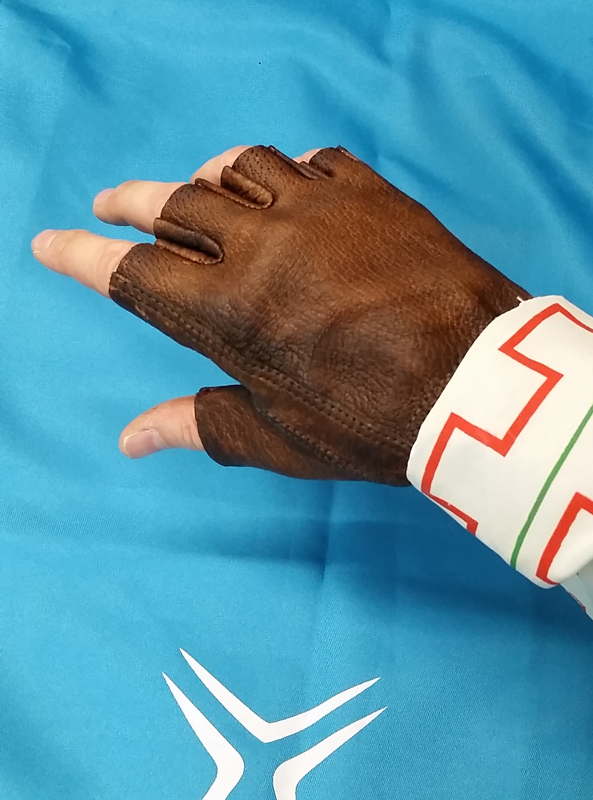
And that’s it! Here are some pictures of the Link gloves complete, and in action.