
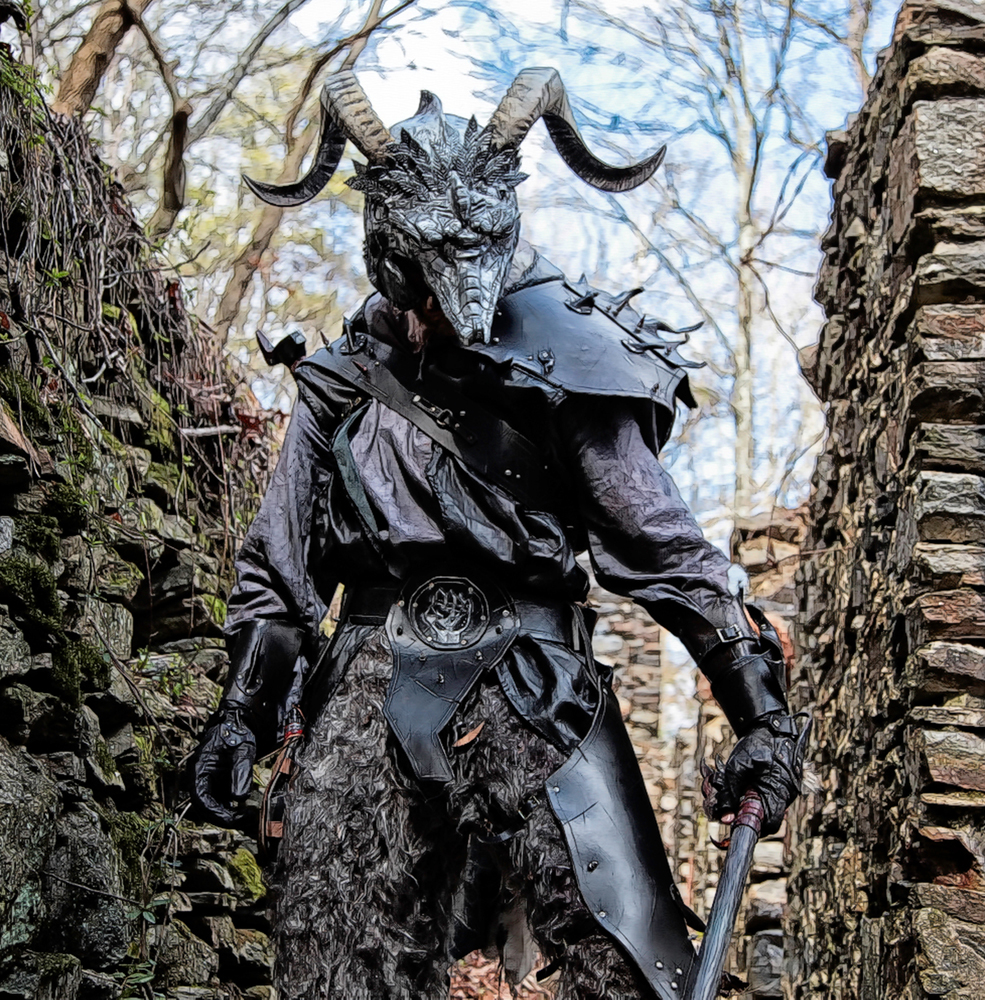
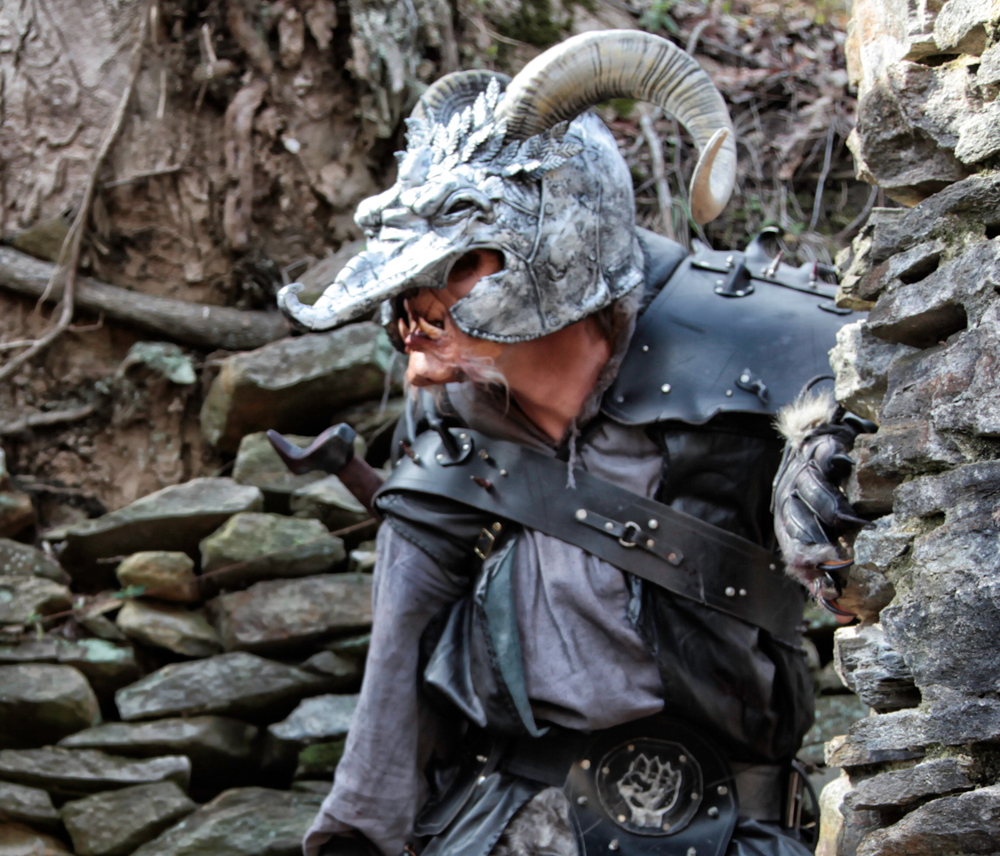
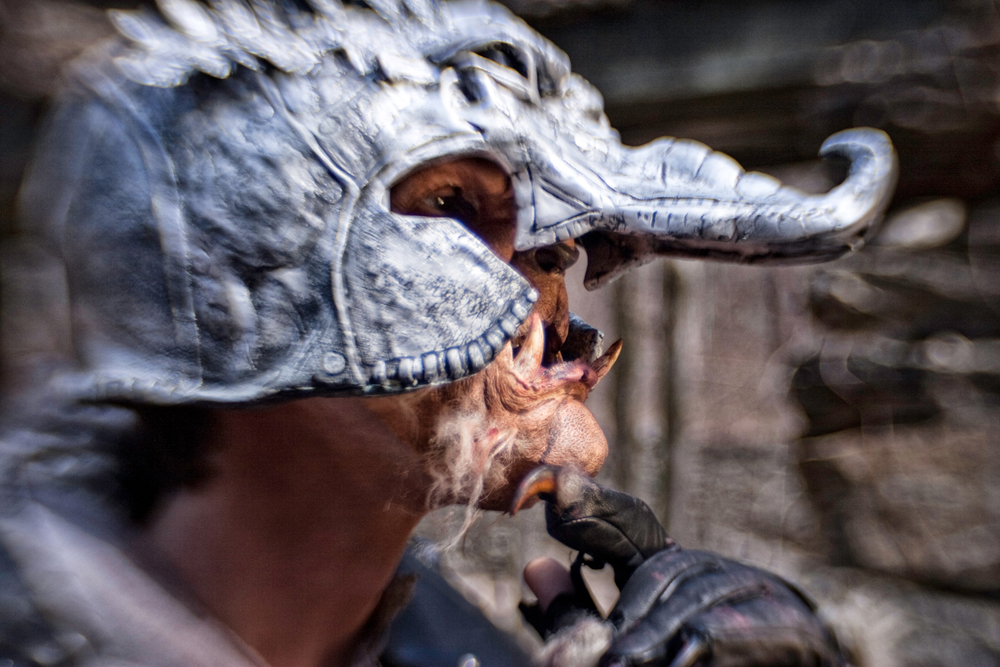
My Trolloc helmet is so cool (in my opinion), I decided to write a tutorial just for this portion of the costume.
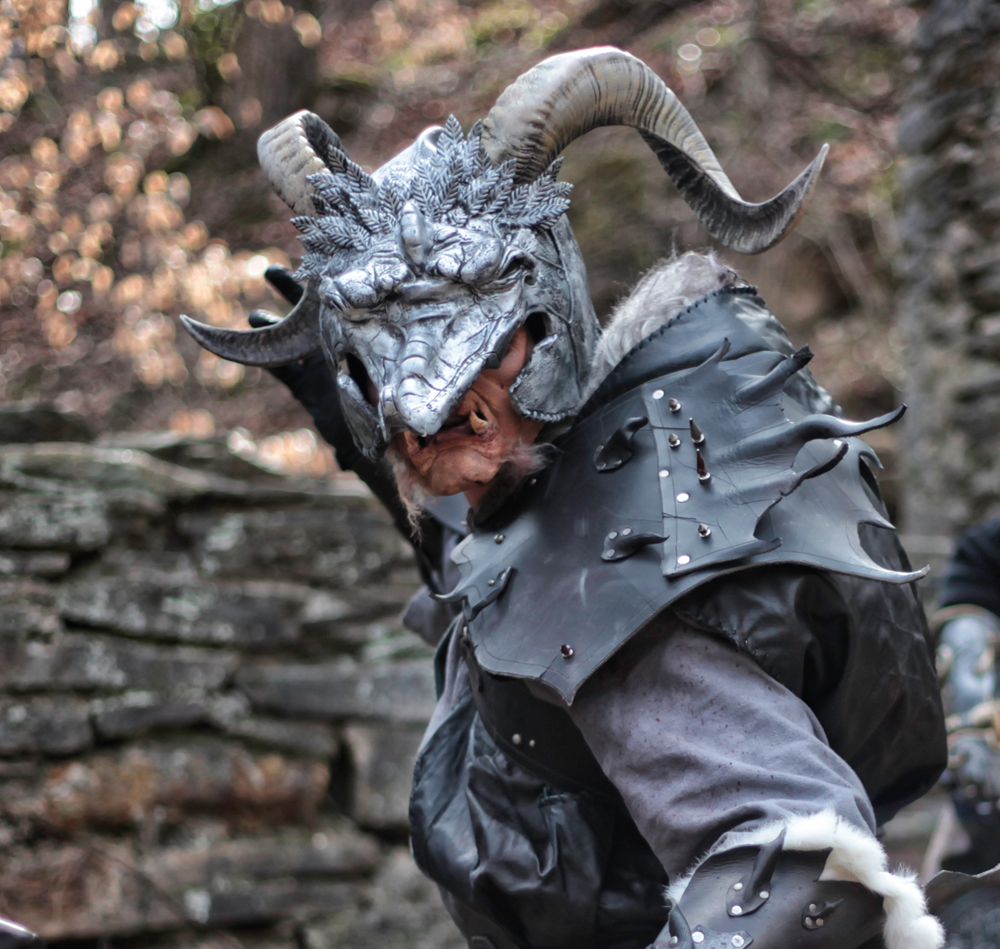
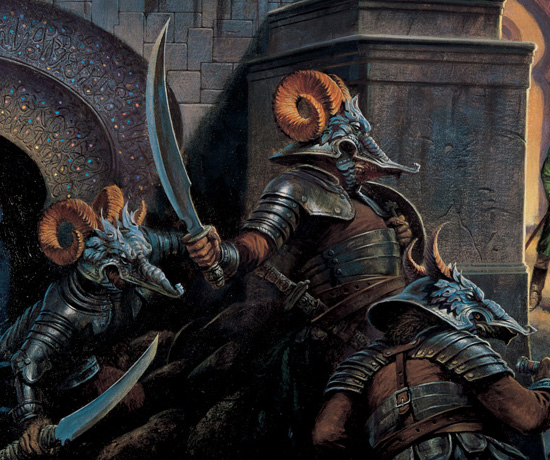
While working on my Trolloc costume, the Darrell K. Sweet style helmet was my main focus, the part that honestly took the most time, and had the most of my attention and care. The helmet consists of many different materials and parts, all built and designed for durability and strength. I needed something that would hold up for years of use, and to be able to survive trips to and from shows. And finally, after wearing it, it could be displayed proudly at my house.
This is the basic list of what I used.
- Child’s baseball helmet
- Latex Halloween Urukhai mask/helmet
- Crayola Model Magic
- Magic Sculpt
- Sculptor’s Wire Mesh
- Metal Leaves (from a metal crown online)
- Ram Horns
- Two 3 inch bolts
- lots of 2 ton epoxy, Rub-n-Buff Paint, and Black Spray Paint
Originally Chip and I had an idea of how to make helmets inexpensively. We purchased some crappy, thin plastic helmets on Amazon, and were going to coat them in Shell Shock (a paintable plastic), and sculpt, and sand, and… yeah, not so much. We spent a good 4 hours working on a single helmet, got about 5% done, and quit. We threw them in the trash, and ate the $25 we lost on that one. Even if we had kept going, it looked… well, like garbage. It was NOT WORTH IT!
So Chip decided he didn’t need a helmet, but I knew that it was still an integral part of my costume. So I started again, this time with a child’s baseball helmet that I got at a department store. I wanted to make sure that it fit tight, so that it wouldn’t shift or fall forward with all the extra bits and weight that I would be adding. Using a dremel, first I removed the visor. I then bought a cheap latex Urukhai helmet/mask from a Halloween store, and stretched it over the helmet. It gave a great base texture on the back and sides of the helmet with minimal effort, but most important, it was thin yet durable. Anything that I could have sculpted onto the helmet at that thickness would have simply chipped off, and would have taken countless hours for such a part of the helmet that not many people would notice.
Then I mounted the horns. Using a pair of our Ram/Satyr Horns, two 3 inch bolts from a hardware store, and a nice amount of 2 ton epoxy and Gorilla glue, I was able to attach the horns securely to the helmet. I then painted them using craft paint to look like old bone.
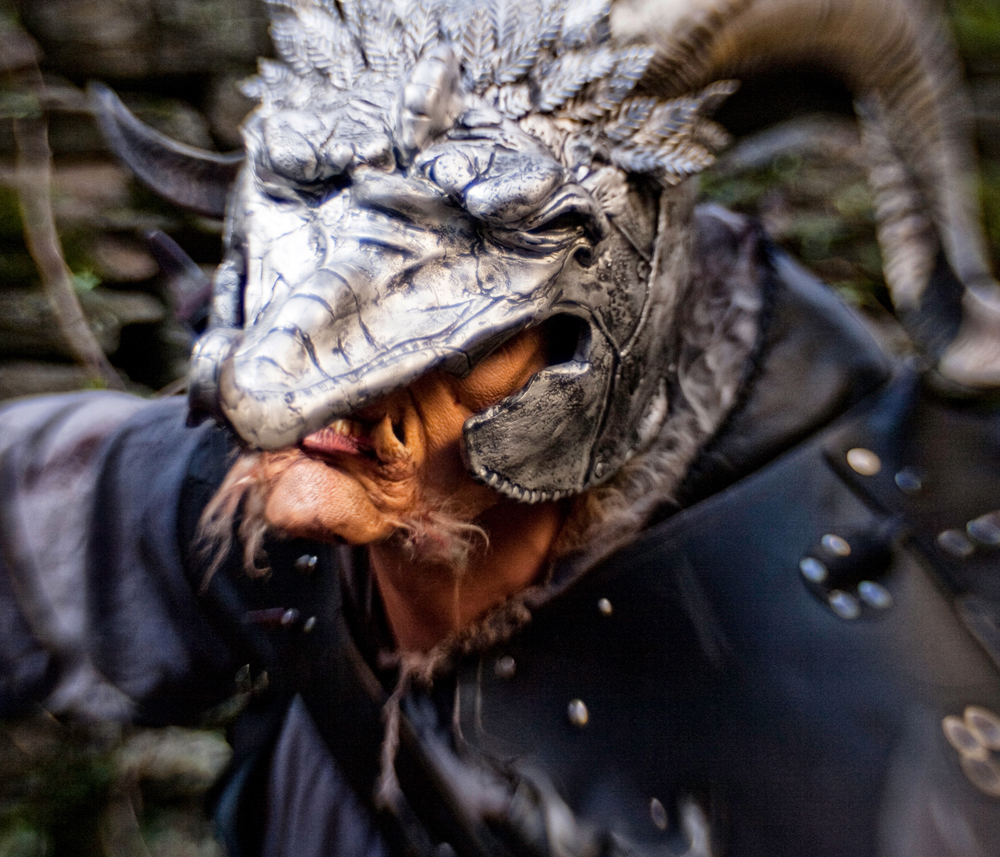
The next step was the most intimidating: reproducing the animal snout of the helmet of the cover artwork. I first created the basic form using Sculptor’s Wire Mesh. I then bolted/screwed that onto the helmet. I then used Crayola Model Magic to sculpt the entire snout. Model Magic is great because it air dries (no baking required), and when it is dry, it is extremely lightweight. What is lacks in strength is handled by the wire skeleton underneath.
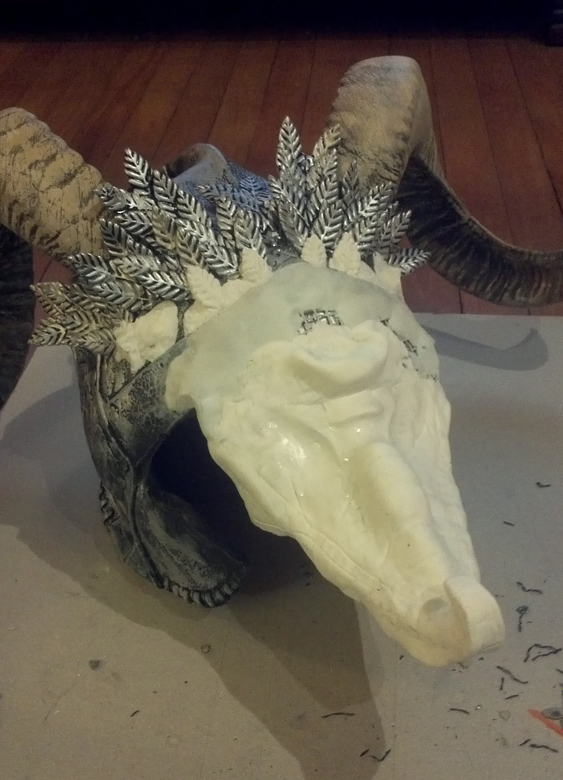
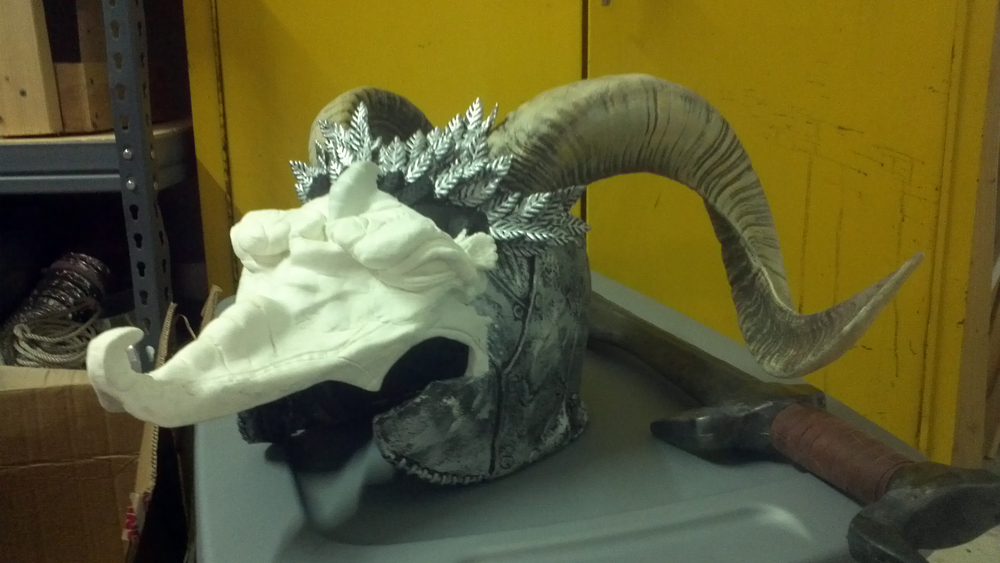
At this point, I used some metal leaves (from my original Crown of Swords!) and screwed/bolted those onto the helmet hiding the base of the horns. You can see in Darrell’s art the flowery petals that I was imitating in front of the horns. I then used Magic Sculpt, an extremely strong 2 part compound to make the cheek guards, and to bridge the space between the metal leaves and the Model Magic snout.
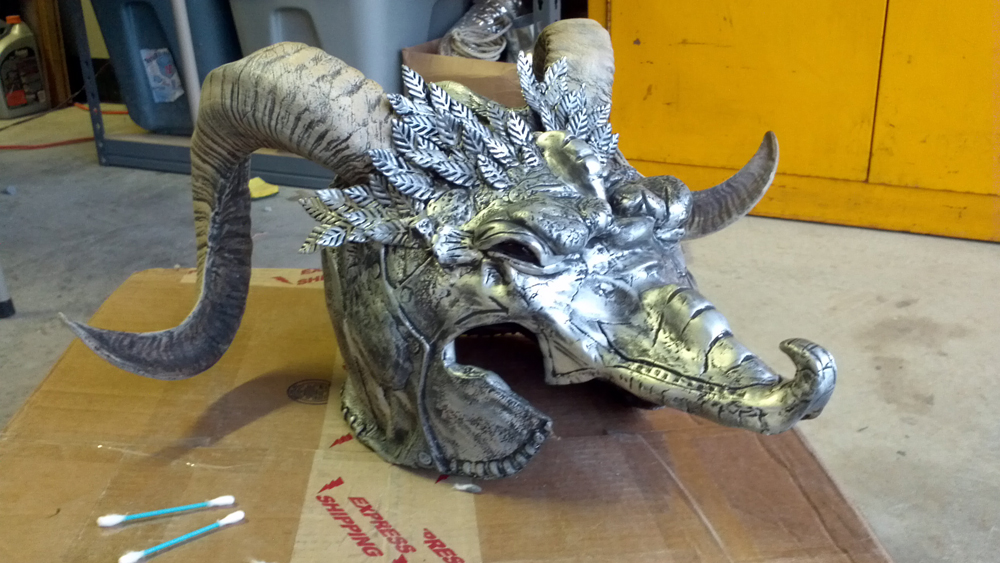
All that was left was to spray paint the entire helmet black, and then use some silver Rub-n-Buff to give the helmet an antiqued metal appearance. And voila!
1 thought on “Trolloc helmet from Robert Jordan’s The Wheel of Time”